There’s nothing quite as satisfying as fully growing your own food in an AeroGarden. But what if you want to grow many plants at once?
Can you plant AeroGarden plants outside? Did you know that you can use it as a seed starter and then transplant seedlings to pots or your outdoor garden?
In this article, we’ll look at how to transplant AeroGarden plants to soil from the AeroGarden and its hydroponic system to a pot or outdoors. This will allow you to grow your own fresh herbs and vegetables without the space limitations of an AeroGarden.
It also saves you time and money because you won’t have to buy more expensive starter plants anymore.
3 Main Reasons to Transplant AeroGarden Plants
There are a few core reasons to transplant AeroGarden plants from water to a pot or outdoor garden.
1. Seed Starting Efficiency and Speed
The AeroGarden is one of the best ways to start seeds and help with germination. It has been shown to be up to three times more efficient than other methods, like paper towels soaked in warm water.
With the seed starting system, you can start seedlings indoors and enjoy a longer growing season. You can start growing seeds in colder weather, with no need for sun and soil.
Depending on which AeroGarden model you have, you will be able to grow up to 85 seedlings at once. Once the seeds start to sprout, you can transplant them to containers with potting soil or outdoor gardens.
Starting your seeds this will also allow you to choose from a larger variety of plants that you wouldn’t otherwise be able to grow in your local environment.

2. Crowding from Too Many Plants
If you’re growing larger plants like tomatoes in your AeroGarden, you should plant your pods in separate areas of your garden because planting all of them together could cause crowding issues.
The individual plants could be hurt by a lack of light, water, and nutrients because they’re all competing for the same sources. You can also try spacing out your plants by using every other space pod if you want to fully grow herbs, fruits, and vegetables in your AeroGarden.
If you want to use all the spaces on the grow deck to start seeds, you can treat it as a seed starter and transplant half te plants to soil.
3. Time to Clean your AeroGarden
Maybe there’s been a little neglect in changing the water every month and you have algae blooming. If you don’t change the AeroGarden water regularly, you may find yourself spending hours cleaning off the mess.
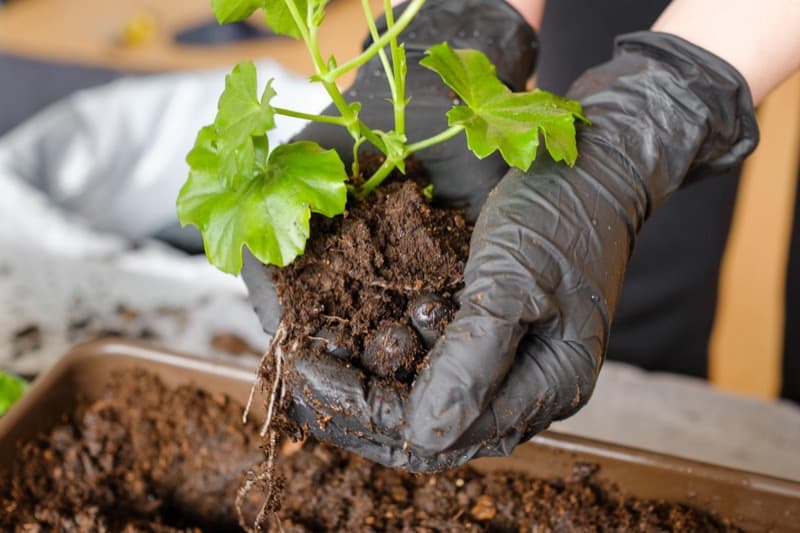
Maybe in the process of cleaning, you want to move the plants into soil. That’s where you’ll need to take care of the root ball first before adding soil. Otherwise, you’ll end up with bare, dead plants.
Learn about How to Clean Your AeroGarden.
Transplanting AeroGarden Plants Precautions
Before getting into the steps of transplanting the seedlings to soil, it’s important to keep some things in mind.
Moving them from a water-based hydroponic system to a soil-based system requires a transition period for the plants.
Roots that develop in a water-based growing system are structurally weaker than those that grow in soil because they are more permeable. Their cell walls are thinner and less resistant to disease.
The AeroGarden roots should be trimmed so that they do not encircle the bottom. The plant should be placed in the middle of the pot with the sponge at the same level as the rim. Firmly pack the soil around the sponge.
As soon as the seedling has its first set of true leaves, it can be moved to soil in a pot. When you put your seeds into the soil, make sure that there is enough space for them to grow. You should also make sure that the soil is moist but not wet.
After planting, you need to let the plants get used to the conditions by letting them sit for about three days. Then you can start watering your plants regularly.
Keep the seedlings indoors until the weather is warm enough for them to be planted out. Provide supplemental lighting if necessary.
How to Transplant AeroGarden Plants
Transplanting AeroGarden plants and herbs is easy. You can even do it yourself. To begin, take care of your seedlings by watering them well. Then when they sprout roots, carefully remove them from the pots and place them into larger containers.
This will help them develop more quickly and make it easier for you to move them around. Once they are ready, plant them outdoors in your garden or indoor pot. Be sure to water them regularly until they are established.
Step 1 – Select your Pot Size
It’s best to select a container that is large enough to accommodate the size of the plant you are going to transplant. If you plan to add soil later, choose a pot that is deep enough to hold the amount of soil you would like to add.
Generally, you should use a pot that is about 4 inches in diameter. This will give the plant enough room to grow without having to worry about root rot or other problems. But also not large enough that there’s going to be water that doesn’t get absorbed.
Step 2 – Prepare the Plant Container
Remove any existing soil from the container. It is best to wash the container thoroughly to ensure that no dirt remains. Next, fill the container with fresh soil, making sure that it is evenly distributed throughout. Make sure that the soil is damp but not too wet.
Leave a space in the center of the pot for the plant to grow.
Step 3 – Remove plants from AeroGarden
Once the container is prepared, gently remove the seedling from the AeroGarden.
Depending on the age of your plants, this can be easily or hard. If your plant is young, you can easily remove the grow sponge from the grow basket.
However, if your plant is fully grown, you may need to take more time to carefully and slowly tease out the grow sponge from the AeroGarden.
Wiggling it from side to side and gently pulling it upwards is slow. This is especially true if you over-planted because all the roots will be tangled together. There is no point trying to rush this process. Your plant could end up dying.
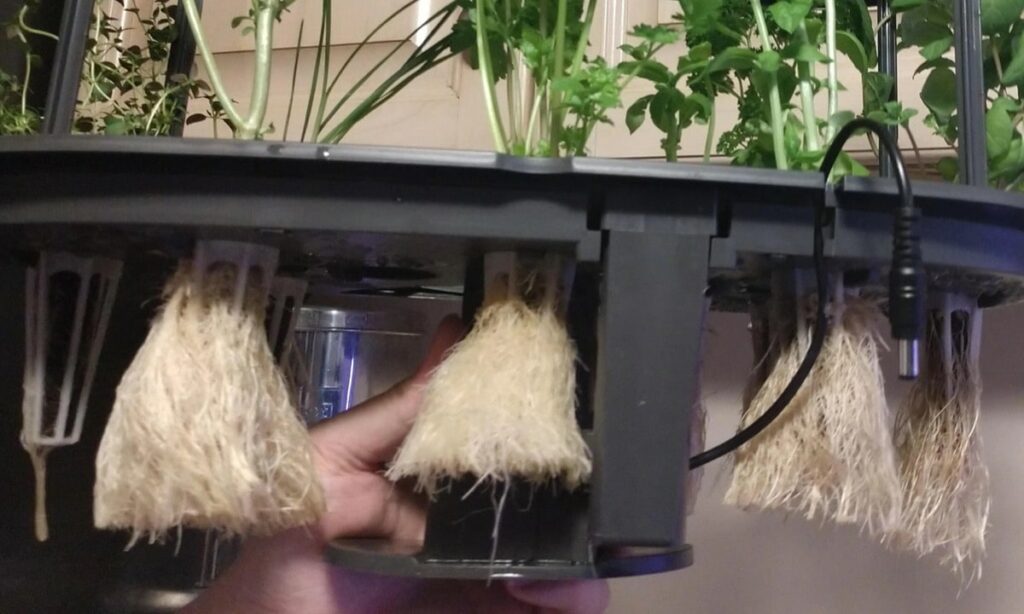
Roots are very long, like very long, but not very wide. You can cut them by hand or use a knife. Try to avoid cutting too many roots because it might cause the plant to fall off the basket.
Step 4 – What to Do With the Grow Baskets
There are two sides to this step. Some will leave the grow basket attached, while others will remove the baskets.
1. Leave Grow Basket Attached
The argument for leaving the grow bag intact is that by removing the basket, there is a chance that the roots will be damaged and the plant will die.
2. Remove Grow Basket
To do this you are going need a pair of good pruning shears, like AeroGarden’s pruning shears. You are going to need to be careful, so you don’ t hurt the plant or yourself. You will want to make a small cuts, only where necessary, to release the root from the basket.
This will take some time, especially if the plants and roots are more mature. But I still prefer it this way to allow the roots to naturally spread in the soil. I don’t want to inhibit its growht.
Step 5 – Put AeroGarden Plants in Pots
When you have finished preparing the plant containers, put the plants into their new homes.
Be gentle when placing the plant in the pot so as not to damage the roots. If you see any signs of discoloration or wilting on the roots, be sure to trim those parts off first.
Put the plant down so the top of the grow sponge is at the same height as the top of the potting soil. Be sure to also spread out the roots in the soil to give them room.
Add soil to the container and pack it down over the root system, but not too tightly or the roots won’t have access to oxygen.
Step 6 – Place the Plants in Light
Place the transplanted AeroGarden plants in a well-lit area with plenty of bright, indirect light. Keep them away from direct sunlight as that will be too harsh.
If you have AeroGarden grow lights, you can place these near the plants. They provide an ideal amount of light without overheating the plants.
- Related: AeroGarden Lights are Not Working
You should check on your plants every day to ensure they are getting enough light. If they aren’t, move them closer to the light source.
Step 7 – Watering Guide
You will need to make sure to keep the soil evenly moist during the first few days. Watering the plant regularly is essential to ensure it stays healthy. When the top layer of soil dries out, the plant needs to be watered again.
Since the AeroGarden plants are used to always having access to water, moist soil will help with the transition to soil.
Check the plant daily to see how much water it requires. Don’t let the soil get too dry or the plant will wilt and become stressed. This will also help with guidance on future waterings.
Step 8 – Hardening the Plants
When transplanting AeroGarden plants, hardening the plants is recommended to allow a transition to a different environment, especially outdoors.
Hardening the plants means giving them time to adjust to the change in temperature, humidity, and other conditions outside.
It is important to note that hardening the plants does not mean exposing them to extreme temperatures or high humidity. The best thing to do is to gradually expose the plants to outdoor conditions.
The process of hardening the plants includes:
- Exposing the plants to natural daylight (sunlight)
- Exposing them to cool air
- Exposing the plants to warm air
Exposure to cold air is the most critical step in hardening the plants. Cold air encourages the plant to form buds and flowers.
This allows the plants to get used to various conditions before going full-time.
Transplant AeroGarden Plants Final Thoughts
Transplanting AeroGarden plants to soil is easy if you follow this guide. You don’t even need to use any special tools in the transplanting process. Just remember to keep the soil moist and watch over the plants carefully.
After a few weeks, your plants will be ready to continue growing in soil in pots and outdoors. Make sure to take care of them while they’re still indoors though because once they go outside, they’ll be exposed to all sorts of weather conditions.
For more on AeroGardens, check out these articles: