Indoor Gardening for Beginners: The Complete Guide [2026]


Disclaimer: As an Amazon Associate, I earn from qualifying purchases. But there are no additional costs to you.

For indoor gardening beginners, the most important decision is matching plants to your available light. Most early failures trace back to this mismatch, not a lack of skill. Herbs like basil, chives, and mint are the safest starting point: fast-growing, compact, forgiving, and ready to harvest in three to four weeks.

Starting an indoor garden feels more complicated than it should be. Walk into any garden center and you’re surrounded by dozens of plant varieties, specialty soils, and grow light options ranging from $15 to $300. It’s easy to spend an hour researching and walk out with nothing, or with the wrong thing.

The frustration is real, even if the stakes are low. A plant that dies within two weeks because it wasn’t right for your conditions can be enough to convince you that indoor gardening isn’t for you. Most early failures aren’t a skill problem, though. They’re a setup problem: the wrong plant for your light level, the wrong container, or watering by the calendar instead of by touch.

This guide walks through everything you need to set yourself up for a first real success: the most beginner-friendly plants, how to assess your home’s light, which soil and containers to use, and the core care routines for watering, feeding, and troubleshooting. Start here and you’ll have something growing within two weeks.

Complete Guide to Indoor Gardening for Beginners
Table of Contents show

Why Indoor Gardening Is Worth Starting

Growing plants indoors isn’t just a hobby for people with green thumbs. It’s one of the most accessible ways to grow fresh food, improve your living space, and stay connected to the rhythms of the natural world, even if you live in an apartment with no yard in sight.

The practical benefits are real. A kitchen herb garden means fresh basil is ten seconds away instead of a grocery run. Leafy greens grown on a sunny windowsill cut down on grocery costs over time. And studies consistently show that tending plants, even small ones, reduces stress and improves mood.

I came to indoor gardening through hydroponics, of all things. I picked up a small indoor smart garden system that sits on the countertop to test it out – I was hooked. I was amazed by the technology, but I also enjoyed the slower, soil-based version of gardening indoors, too. A few herb pots on the kitchen counter scratched a different kind of itch, and now I keep both approaches running year-round.

There’s also a seasonal freedom that outdoor gardening can’t offer. Indoors, you’re not at the mercy of frost dates or short growing windows. You can grow year-round, harvest what you need, and start over whenever you like.

Related: Best AeroGardens for Indoor Gardening

The Best Plants for Indoor Gardening Beginners

The Best Plants for Indoor Gardening Beginners

The single biggest mistake new indoor gardeners make is choosing the wrong plant to start with. Fruiting plants like tomatoes and peppers are exciting, but they’re demanding, and a rocky start can kill your motivation before it takes root. The sections below break down the most reliable categories, with specific recommendations that consistently work well for beginners.

Indoor Herbs

Herbs are the ideal starting point. They’re fast-growing, compact, immediately useful in the kitchen, and they communicate clearly when something is wrong. A wilting basil plant or yellowing mint is hard to miss, which makes course-correcting easy.

The most reliable herbs for beginners:

  • Basil grows quickly in warm conditions and is ready to harvest in three to four weeks.
  • Mint is nearly impossible to kill and will produce for months with minimal attention.
  • Chives are a cut-and-come-again herb that regrow continuously after each harvest.
  • Parsley, oregano, and thyme are reliable choices that need little attention once they’re established.

Keep mint in its own container. It spreads aggressively and will crowd out anything growing nearby.

Related: How to Grow Herbs Indoors Without Sunlight

Indoor Vegetables

Not all vegetables are suited for indoor growing, but a handful perform reliably in containers with good light:

  • Lettuce and leafy greens (spinach, arugula, kale) tolerate moderate light, grow quickly, and let you harvest outer leaves in three to four weeks without pulling the whole plant.
  • Radishes germinate fast and are ready to harvest in about a month.
  • Green onions and scallions are low-maintenance, and you can even regrow them from grocery store roots set in a glass of water.
  • Cherry tomatoes, peppers, and cucumbers are possible for beginners, but plan for more light, more patience, and a longer wait. Better as a second or third project once you have some experience.

I started with basil and chives, mostly because my wife was interested in using fresh herbs for cooking. Neither of us expected much, but we were genuinely excited when that first basil plant filled out and we could harvest from it. It’s a small thing, but it made the whole concept feel real in a way that reading about it never quite did.

Related: 11 Best Hydroponic Vegetables to Grow

Indoor Houseplants

If food production isn’t your main goal, or if you want to build confidence before tackling edibles, start with houseplants that tolerate neglect:

If you’re not sure where to start, here are some ideas to help you find the perfect indoor plant for your indoor garden:

Explore 100+ houseplants in our Houseplant Directory

How to Set Up Your Indoor Garden

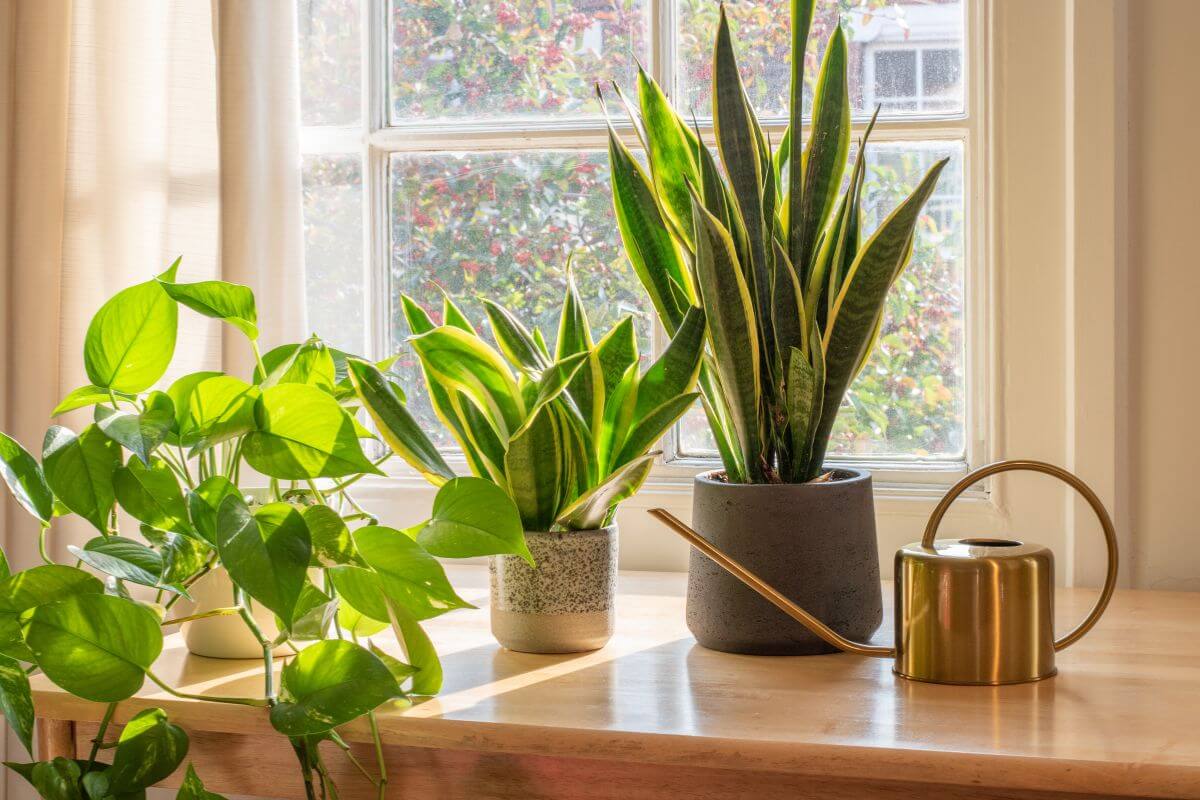
Three potted houseplants sit on a sunlit windowsill, ideal for indoor gardening for beginners.

Setting up correctly from the start saves a lot of frustration later. The core decisions — where to place your plants, what to grow them in, and what supplies to have on hand — all compound over time. Get them right upfront and the rest of the process is much more forgiving.

Finding the Right Spot in Your Home

Before you buy a single plant or pot, take a walk around your home and observe the light. The location you choose will determine which plants are realistic, and setting up in the wrong spot is one of the most common reasons indoor gardens fail.

South-facing windows get the most direct light throughout the day, making them ideal for herbs, vegetables, and any plant that wants bright conditions. East-facing windows provide gentler morning light, which works well for many houseplants and leafy greens. West-facing windows offer afternoon light that can be intense in summer. North-facing windows get the least light and are best reserved for low-light plants like pothos, snake plants, or ferns.

Keep plants away from heating vents, air conditioners, and drafty windowsills. Temperature swings stress plants and can cause leaf drop and slow growth even when light and water are otherwise fine.

Related: 11 Best Houseplants to Grow as Window Plants

Selecting Your Growing Medium

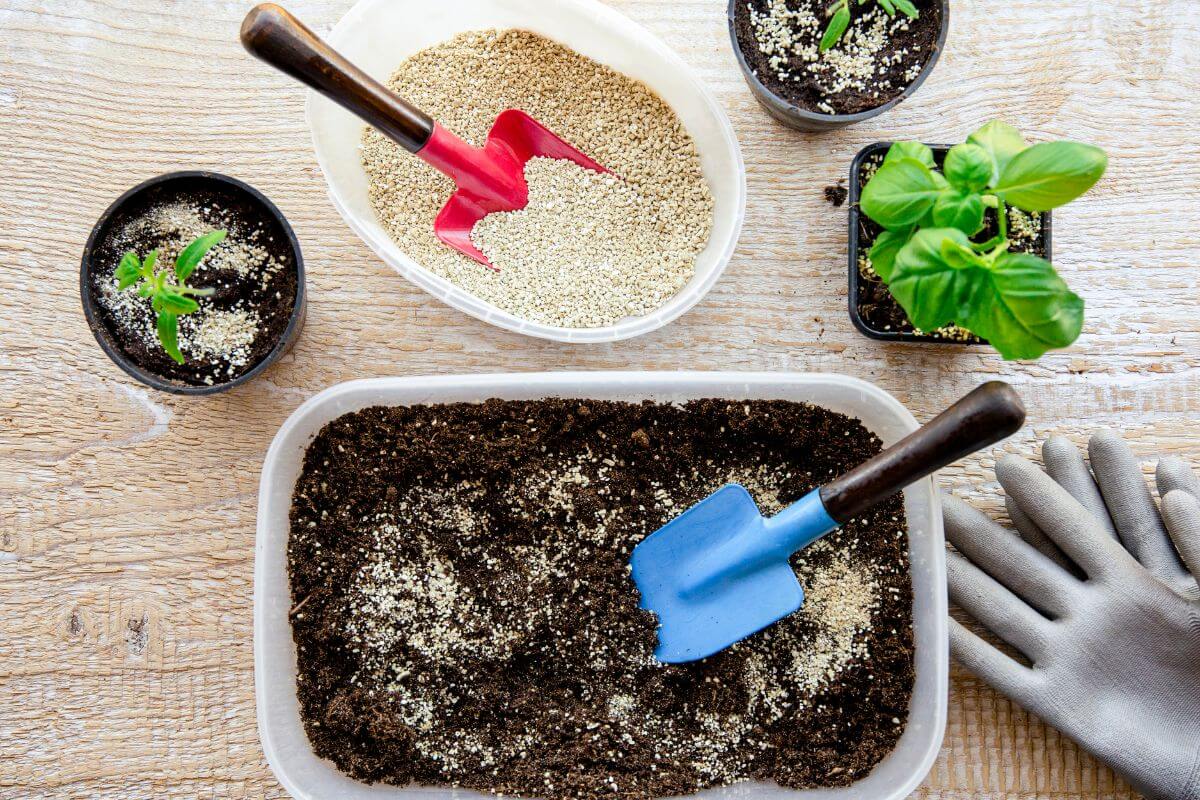
Gardening setup showing a container with soil of vermiculite mixture and a blue spade, a small pot with plants, another container with seeds and a red spade, and gardening gloves on the side, perfect for indoor gardening for beginners.

The growing medium you choose determines how your plants access water, nutrients, and oxygen — and your options go well beyond a bag of potting soil. Here’s what’s available and what makes sense for a beginner.

  • Potting soil is the right starting point for most people. A quality indoor potting mix contains pine bark, peat moss, and either vermiculite or perlite for drainage and aeration. It’s forgiving, widely available, and easy to troubleshoot. Avoid garden soil in containers — it’s too dense, drains poorly, and can introduce pests into your home.
  • Hydroponics grows plants in nutrient-enriched water instead of soil. Systems like AeroGarden and Click and Grow have made this genuinely accessible for home growers, handling lighting and nutrient delivery automatically. Growth tends to be faster than soil, but the upfront cost is higher and there’s less flexibility in what you can grow.
  • Aquaponics takes hydroponics a step further by combining it with fish farming. Plants feed on fish waste; the plants clean the water for the fish. It’s a self-sustaining system that eliminates synthetic fertilizers, though it requires more setup and monitoring than either soil or standard hydroponics.
  • Aeroponics suspends plant roots in the air and delivers nutrients via a fine mist. It’s the most efficient system in terms of water use and allows for high plant density in a small footprint — but it’s also the most technical and least forgiving of the four.

If you’re just getting started, soil is the better teacher. Once you understand how your plants respond to water, light, and feeding, you’ll be in a much better position to get the most out of a hydroponic system when you’re ready to level up. For most beginners, that progression — soil first, hydroponics second — is the fastest path to a thriving indoor garden.

Related: Hydroponic Growing vs Soil (11 Key Differences)

Choosing the Right Containers and Pots

Container choice matters more than most beginners expect. The two most important factors are size and drainage.

Size should match the plant. A small herb like basil does fine in a 4-inch pot. Tomatoes or large leafy greens need containers that are at least 8 to 12 inches in diameter to give roots enough room to spread. Planting a small herb in an oversized pot is a common mistake. The excess soil holds moisture the roots can’t absorb, which leads to waterlogging and rot.

Every container needs a drainage hole. Without one, water accumulates at the bottom and suffocates roots. Terra cotta pots are a reliable choice because their porous walls allow some airflow and help soil dry out at a reasonable rate. Plastic pots retain moisture longer, which can work well for plants that like consistent moisture but requires more careful watering discipline.

Place a saucer or tray beneath each pot to catch drainage, and empty it after watering so plants aren’t sitting in standing water.

I went through two batches of herbs before I figured out the container mistake. Both times I used a pot that was too big, and the soil stayed wet far longer than it should have. Once I switched to smaller, appropriately-sized pots with drainage holes, the difference was immediate. I could actually tell when the soil was ready to water again instead of guessing.

Quick Tip: Add a small layer of drainage rocks to the bottom of your container before you add soil. The stones will create crevices that water will flow through, ensuring the soil doesn’t restrict water from flowing through the small drainage built into your container.

The Best Potting Mix for Indoor Plants

Gardening setup showing a container with soil of vermiculite mixture and a blue spade, a small pot with plants, another container with seeds and a red spade, and gardening gloves on the side, perfect for indoor gardening for beginners.

Never use garden soil in containers. It’s too dense for indoor pots, drains poorly, and can introduce pests and disease into your home. A quality indoor potting mix is the right choice, and it’s worth paying a bit more for a good one.

Look for a potting mix that contains perlite or vermiculite for drainage and aeration. These ingredients keep the mix loose enough for roots to breathe. Mixes labeled for indoor use or container gardening are generally well-balanced for most plants.

For cacti and succulents, use a cactus-specific mix, or blend your own by mixing a standard potting mix with coarse sand or additional perlite. These plants need soil that dries out quickly between waterings.

Potting mix nutrients deplete over time, especially after a few months of regular watering. Supplement with fertilizer as the plant establishes and grows.

Start Here: Best Potting Soil For Indoor Plants

Essential Tools and Supplies to Have on Hand

You don’t need much to get started. Here are the basics:

  • Watering can with a narrow spout gives you more control than a cup or pitcher.
  • Small spray bottle for misting humidity-loving plants.
  • Moisture meter takes the guesswork out of watering and is worth the modest investment for beginners.
  • Clean pruning shears or sharp scissors for harvesting herbs and trimming dead growth. Keep them clean between uses to avoid spreading disease between plants.
  • Liquid fertilizer for supplementing nutrients once the potting mix is depleted.
  • Plant labels so you remember what you planted.
  • Quality indoor potting mix — you’ll use more of this than anything else.

Resist the urge to overbuy. Simple setups are easier to manage, and you’ll learn faster with fewer variables.

Related: Essential Gardening Tools for Beginner Gardeners

Lighting: The Most Important Factor for Indoor Plants

Light is the single biggest determining factor in whether an indoor garden thrives or struggles. You can have the perfect soil, the right containers, and a careful watering schedule, but without adequate light, plants can’t photosynthesize, and they won’t grow.

Understanding Your Home’s Natural Light

Two potted ferns, known as some of the hardest houseplants to care for, sit on a white surface in a sunlit room. The pots feature subtle patterns, and a wooden shelf in the background holds another plant. Blinds on a window let in natural light, enhancing the peaceful atmosphere.

The light levels that look bright to human eyes are often much lower than what plants actually need. Even a room that feels sunny can deliver only a fraction of the light intensity that outdoor conditions provide.

  • Direct light: sunlight falling directly onto the plant, usually within a few feet of a south-facing window. Most edible plants prefer this.
  • Indirect or bright indirect light: light that reaches a plant without direct sun exposure, filtered through curtains or reflected from walls. Most houseplants prefer this.
  • Low light: little to no natural sunlight, suitable only for a handful of shade-tolerant species.

One practical test: hold your hand about a foot above a white piece of paper. A sharp shadow means direct or bright indirect light. A faint shadow means medium light. No visible shadow means low light, and very few plants will do more than survive in those conditions.

Additional Reading: 11 Best Houseplants to Grow as Window Plants

When to Add a Grow Light

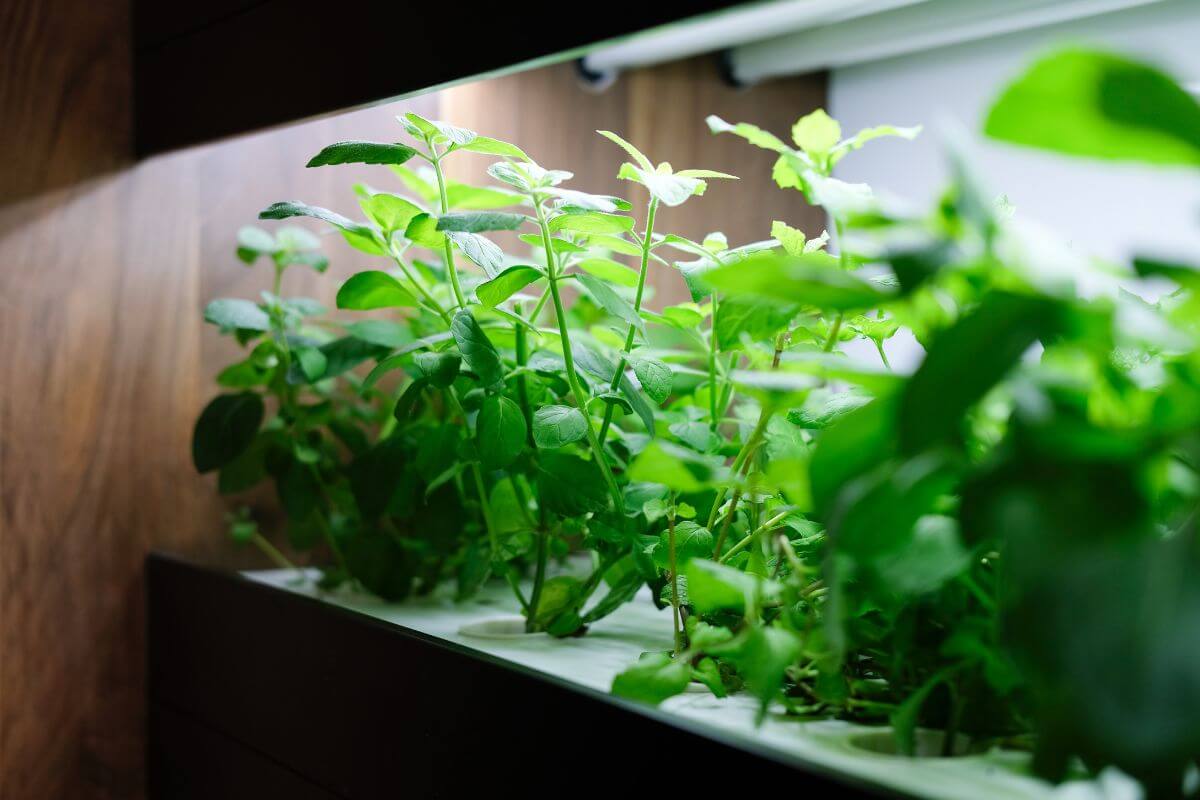
A lush indoor herb garden with green plants growing under a grow light, an ideal setup for indoor gardening for beginners.

If your home doesn’t have a well-lit south or east-facing window, or if you want to grow plants that need more light than your windows can provide, a grow light is the solution. They’re no longer expensive or complicated. A basic clip-on or desk LED grow light can run for a few dollars a month in electricity and makes a significant difference.

Signs your plants need more light include slow or stopped growth, leaves that are smaller and paler than normal, and stems that stretch and lean dramatically toward a light source. This stretching, called etiolation, is the plant’s distress signal that it isn’t getting what it needs.

Plan for 12 to 16 hours of grow light exposure per day for most herbs and vegetables. Houseplants generally need less, around 10 to 12 hours. Use a simple outlet timer so you don’t have to remember to turn it on and off.

Adding a grow light was one of those small changes I didn’t expect to matter much, but it transformed what we could grow. Our kitchen window is east-facing, which is fine for some things but not enough for basil in the winter. With a clip-on LED panel running on a timer, we’ve had basil going continuously for the last two winters without interruption.

Related: Best Grow Lights for Hydroponics and How to Choose the Right Ones

How to Choose the Right Grow Light

LED grow lights are the best choice for most indoor gardeners. They’re energy efficient, produce little heat, and last a long time. Look for a full-spectrum LED, which provides the range of light wavelengths plants need for both leafy growth and flowering or fruiting.

For a small herb garden or a few houseplants, a single panel or clip-on LED grow light with 20 to 40 watts of output is usually sufficient. For larger setups or fruiting plants like tomatoes, look for a higher-output panel and position it 12 to 24 inches above the plant canopy according to the manufacturer’s guidance.

Related: Grow Lights vs Sunlight- Which Is Better for Growing Plants?

How to Water Indoor Plants the Right Way

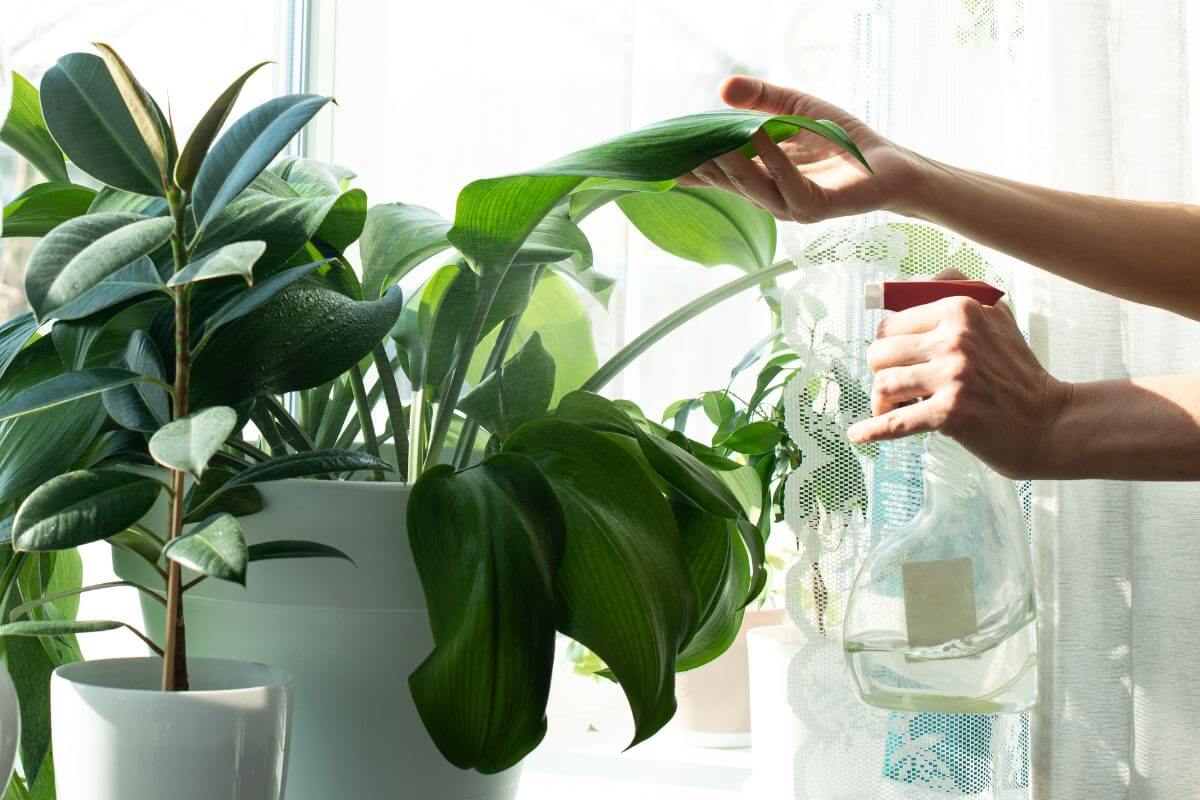
A person misting large, green houseplants with a spray bottle near a sunlit window, perfect for indoor gardening for beginners.

Overwatering kills more houseplants than anything else. It’s the most common beginner mistake, and the damage, root rot, usually happens underground before any visible symptoms appear.

I overwatered my first few plants pretty badly. I was treating them like something that needed attention every other day, the way you’d check in on any other household system. A moisture meter changed how I approached it completely. Instead of guessing or counting days, I just checked the soil, and I stopped losing plants to root rot almost immediately.

How Often Should You Water?

The honest answer is: it depends on the plant, the pot, the soil, and the conditions in your home. “Water once a week” is a starting point, not a rule. The only reliable method is checking the soil before you water.

Stick your finger one to two inches into the soil. If it feels moist, wait. If it feels dry at that depth, it’s time to water. For succulents and cacti, let the soil dry out completely between waterings. For moisture-loving tropical plants, water when the top inch is dry rather than letting it dry out fully.

When you do water, water thoroughly until it drains from the bottom of the pot, then let it drain completely before returning the plant to its saucer. This ensures the entire root zone gets moisture and flushes out salt buildup from fertilizer over time.

Overwatering vs. Underwatering: How to Tell the Difference

Both look similar on the surface, which is why overwatering is so often mistaken for thirst. The key difference is always the soil.

Signs of overwatering:

  • Yellow, mushy leaves
  • Plant looks droopy despite moist soil
  • Soil stays wet or persistently damp

Signs of underwatering:

  • Crispy brown leaf edges
  • Leaves that feel thin or papery
  • Soil is bone dry, often pulling away from the edges of the pot

Recovery from underwatering is straightforward: water thoroughly and the plant typically bounces back within a day or two. Recovery from overwatering is harder. Let the soil dry out completely, check for root rot by gently removing the plant from its pot, and trim any blackened or mushy roots before repotting in fresh dry mix.

Feeding Your Indoor Plants

A person pouring liquid fertilizer from a green-topped bottle into a small transparent measuring cup.

Plants growing in containers depend on you for their nutrients. Unlike garden beds where roots can spread and forage, container plants are limited to whatever is in the pot. That means feeding them on a regular schedule is the only way to keep them producing and looking their best.

When to Start Fertilizing

Most quality potting mixes come with a starter charge of nutrients, enough to sustain a plant for about six to eight weeks. After that, those nutrients are depleted and the plant is relying on you to replenish them.

A plant that isn’t being fertilized will often grow slowly, produce smaller leaves, and look a bit dull overall. It won’t necessarily die, but it won’t thrive either.

Start feeding most indoor plants every two weeks during active growing periods in spring and summer. In fall and winter, when growth slows, reduce fertilizing to once a month or stop altogether. Plants in dormancy or low-light conditions don’t need much input.

Choosing the Right Indoor Fertilizer

A balanced liquid fertilizer with roughly equal nitrogen, phosphorus, and potassium, such as a 10-10-10 formula or 5-5-5 formula, is the most versatile option for most indoor plants. Mix it at half the recommended strength to avoid over-fertilizing, which can burn roots and cause leaf damage.

For herbs and leafy greens, a fertilizer slightly higher in nitrogen encourages the leafy growth you’re actually harvesting. For flowering or fruiting plants, look for a formula with higher phosphorus to support blooms and fruit development.

Fish emulsion and seaweed-based fertilizers are excellent organic options that feed the soil gradually and are harder to overdo. They do have a brief smell when first applied, but it dissipates quickly.

I went through a phase of over-fertilizing when we first got serious about indoor growing. I figured more nutrients meant faster growth, which is the kind of logic that makes sense until you burn your basil’s roots and have to start over. Half-strength, every two weeks, that’s what I’ve landed on, and the plants look better than they ever did when I was overdoing it.

Related: Fertilizer Types And How To Fertilize The Garden

Temperature and Humidity for Indoor Gardening

A digital display shows a temperature of 20.3°C and a humidity level of 58% RH, hinting at tips on how to control humidity in a grow tent.

Temperature and humidity are two conditions beginners rarely think about until something goes wrong. Most homes fall within a comfortable range for the plants in this guide, but the microclimate around a specific windowsill or heating vent can be very different from the thermostat reading in another room.

Ideal Temperature for Indoor Plants

Most common indoor plants, including herbs, leafy greens, and popular houseplants, prefer temperatures in the 65 to 75 degrees Fahrenheit range. That’s essentially the same range most people keep their homes, which is one reason indoor gardening works so well. You and your plants are comfortable at the same temperature.

Where things go wrong is in the microclimates around your home. Windowsills can get much colder at night in winter, especially with single-pane glass. Spots near heating vents blast hot, dry air. Air conditioning units create cold drafts. Check the specific spot where your plant will live before committing to it, not just the room temperature.

Most tropical houseplants are sensitive to cold drafts and should be kept away from windows during winter. Cool-season crops like lettuce, spinach, and herbs like cilantro actually prefer slightly cooler conditions, around 60 to 68 degrees, which makes them good choices for a cooler room in the home.

How to Increase Humidity Indoors

Most homes, especially in winter when heating systems run constantly, are drier than most plants prefer. Average indoor humidity often sits between 20 and 30 percent, while most houseplants and herbs do best above 40 percent.

The most effective solution is a small humidifier placed near your plants. A cool-mist humidifier runs quietly and inexpensively and makes a real difference for humidity-loving plants like basil, ferns, and tropical foliage plants.

If a humidifier isn’t in the budget, grouping plants together helps them create a more humid microclimate around themselves through the water they release. A pebble tray, a shallow dish filled with pebbles and a little water with the pot resting on top, adds some humidity through evaporation without waterlogging the roots.

Misting with a spray bottle provides only a brief boost and requires repeating several times a day to make a meaningful difference. It works better as a supplement than a primary strategy.

We noticed our basil kept struggling through winter, even with a good grow light. A friend suggested the problem might be humidity, not light. I picked up a small cool-mist humidifier for about $25 and placed it near the herb shelf. Within a week the basil looked completely different, fuller, more upright, and actually growing again. It was the easiest fix we hadn’t thought to try.

Related: 9 Best Humidifiers for Plants

How to Start Your Indoor Garden: Step-by-Step

Starting feels more complicated than it actually is. Here’s how to go from zero to your first thriving plant in a weekend.

  1. Choose your plant. Start with one to three plants, not a dozen. Pick something from the beginner-friendly lists above, herbs like basil or chives, a leafy green like lettuce, or a low-maintenance houseplant like a pothos or snake plant.
  2. Assess your light. Walk through your home and identify your brightest window. If you have a south or east-facing window with a few hours of direct sun, you can grow most herbs and leafy greens there without a grow light. If your light is limited, plan to add a grow light.
  3. Choose your containers. Match container size to plant size. Make sure every container has a drainage hole. If you’re starting from seed, use small seed-starting cells or a shallow tray, then transplant once seedlings are a few inches tall.
  4. Fill with potting mix. Use a quality indoor potting mix, not garden soil. Fill containers to about an inch below the rim.
  5. Plant or sow. Follow seed packet instructions for depth and spacing. If transplanting a nursery plant, set it at the same depth it was growing in its original container.
  6. Water in. Give the soil a thorough initial watering until water drains from the bottom. Let it drain completely.
  7. Place in your chosen spot. If using a grow light, position it at the appropriate distance above the plant and set a timer for 12 to 16 hours on.
  8. Check on it daily at first. Watch how the plant responds in its first week. Adjust light or watering based on what the plant tells you through its leaves.

Related: Explore our collection of how-to gardening guides

Common Indoor Gardening Problems and How to Fix Them

Every indoor gardener runs into problems, and most of the common ones follow predictable patterns. The key is knowing what to look for and responding before a small issue becomes a dead plant. Here’s what you’re most likely to encounter and exactly what to do about it.

Yellowing Leaves

Yellow leaves are the most common distress signal and have several possible causes. The most frequent culprit is overwatering, which prevents roots from absorbing oxygen and leads to a general yellowing of older leaves. Let the soil dry out completely and check whether the drainage is adequate.

Nutrient deficiency is another cause, especially in plants that have been in the same soil for a long time without fertilizing. A balanced liquid fertilizer usually resolves this within a few weeks.

Low light can also cause yellowing and slow growth. If the yellowing is paired with stretched stems, more light is likely the solution.

Root Rot

Root rot is a fungal condition caused by consistently wet soil. The roots turn brown or black, become mushy, and lose their ability to take up water or nutrients. The plant above the soil looks droopy and sad even when the soil is wet, because the roots can no longer do their job.

To treat it, remove the plant from its pot, shake off the old soil, and inspect the roots. Trim away all dark, soft roots with clean scissors. Let the remaining healthy roots air out briefly, then repot in fresh, dry potting mix. Hold off on watering for a few days and avoid overwatering going forward.

Prevention is straightforward: never let plants sit in standing water, always use pots with drainage, and let the soil dry to the appropriate depth before watering again.

Indoor Plant Pests

Indoor plants are not immune to pests, and a few species show up frequently enough that every indoor gardener should know them.

Fungus gnats are the small, dark flies you’ll see hovering around your soil. The adults are mostly a nuisance, but their larvae live in the soil and can damage roots, especially in seedlings. They’re attracted to consistently moist soil. Let the top inch of soil dry out more between waterings, and a yellow sticky trap nearby will catch the adults. Beneficial nematodes can be watered into the soil to target the larvae.

Spider mites are tiny and often invisible until you notice fine webbing on the underside of leaves and stippled, pale foliage. They thrive in dry, warm conditions. Rinse plants thoroughly with water, then apply neem oil or insecticidal soap, repeating every few days for two weeks to break the life cycle.

Mealybugs look like tiny white cotton tufts in the joints of stems and under leaves. Remove them by wiping with a cotton swab dipped in rubbing alcohol, then follow up with a neem oil spray.

We had a spider mite infestation on a tomato plant I was trying to grow indoors one winter. I missed the early signs because I wasn’t checking the undersides of the leaves, and by the time I noticed the webbing it had spread to two nearby pots. Took three rounds of neem oil spray to clear it. Now I check the undersides every time I water. It takes an extra 30 seconds and catches problems before they spread.

Catching any pest early makes treatment much easier. Check the undersides of leaves regularly as part of your routine.

Leggy, Stretching Plants

When plants grow tall, thin, and stretched toward a light source, they’re not thriving. This condition, called etiolation, is almost always a light problem. The plant is reaching for more light than it’s receiving.

Move the plant closer to your light source, or add a grow light positioned directly above it. Compact LED grow lights make a significant difference quickly. Once you improve the light, new growth will come in much more compact and healthy. The stretched stems won’t shrink back, but you can trim them to encourage bushier regrowth, especially on herbs like basil.

Frequently Asked Questions

Can you grow vegetables indoors year-round?

Yes, and that’s one of the real advantages of indoor gardening. You’re not limited by seasons or frost dates. With consistent light, either from a bright window or a grow light, most leafy greens and herbs can be grown continuously.

What is the easiest vegetable to grow indoors?

Lettuce is the easiest edible plant for most beginners. It germinates quickly, grows in lower light than most vegetables, tolerates cooler temperatures, and can be harvested by the leaf without pulling the whole plant. Green onions and radishes are close runners-up.

How much does it cost to start an indoor garden?

A basic herb garden can be set up for under $30: a few small pots, a bag of potting mix, and a packet of seeds. If you add a grow light, expect to spend another $15 to $40 depending on the size. The ongoing costs are minimal: seeds, occasional potting mix, and a small amount of fertilizer.

Do indoor plants need special soil?

Yes. Garden soil compacts badly in containers and can introduce pests and disease. Always use an indoor potting mix, which is lighter, drains better, and is designed for container use.

How do I know if my plant is getting too much or too little light?

Too little light: slow growth, small pale leaves, stretched stems leaning toward the window. Too much direct light: brown or bleached patches on leaves, crispy leaf edges, very dry soil. Most houseplants prefer bright indirect light, while most herbs and edibles want as much direct light as possible.

What’s the best way to raise humidity for my plants?

A small cool-mist humidifier near your plants is the most effective method. Grouping plants together and using a pebble tray with water are helpful secondary strategies. Misting alone isn’t enough for plants that need genuinely higher humidity.

Getting Your Indoor Garden Off the Ground

Starting an indoor garden doesn’t require a lot of space, a lot of money, or any previous experience. It requires a little patience, a willingness to read what your plants are telling you, and a reasonable spot near a window. Most beginners who fail do so because they overcomplicate it or choose plants that aren’t right for their conditions. Start simple, pay attention, and expand from there.

The skills you build with one plant, learning how that particular variety drinks, responds to light, and grows, carry directly to the next one. Give yourself permission to start small.

You may also be interested in the following:

Photo of author

Written by:

Henry Bravo
Henry Bravo, a University of California, Davis graduate with a BS in Plant Sciences, combines his expertise in horticulture with a passion for smart technology. He specializes in smart gardens, hydroponics, and robotic lawn care, aiming to enhance gardening practices for families. Henry's articles focus on integrating cutting-edge technology to make gardening more efficient and enjoyable, reflecting his commitment to merging natural greenery with innovative solutions.

1 thought on “Indoor Gardening for Beginners: The Complete Guide [2026]”

Comments are closed.