Growing tomatoes indoors can be fun and rewarding. You’ll love watching these plants grow from tiny seeds to juicy fruits. Yes, tomatoes are actually fruits! They’re berries, botanically speaking.
From bright red to sunny yellow, deep purple to striped green, tomatoes come in a stunning array of hues. And their shapes and sizes are just as different. You’ll find tiny cherry tomatoes perfect for snacking and massive beefsteak varieties ideal for sandwiches.
But tomatoes aren’t just pretty to look at. They’re packed with good-for-you nutrients too. Each bite gives you a boost of vitamins A and C. Plus, tomatoes are full of lycopene, an antioxidant that may help protect your health.
If you are ready to start your indoor tomato garden, the AeroGarden is the perfect tool for the job. I’ll share some expert tips to help you grow the tastiest tomatoes right in your kitchen. Let’s dig in and go over all you need to know to grow and harvest AeroGarden tomatoes successfully.
- Related article: Best Things to Grow in an AeroGarden
7 Key Takeaways on AeroGarden Tomatoes
- Tomatoes need plenty of light and space to thrive. Ensure your AeroGarden setup allows sufficient room between plants to support healthy growth.
- AeroGarden offers various tomato seed pod kits like Red Heirloom Cherry Tomato and Salsa Garden, catering to different preferences.
- Depending on your AeroGarden model, you can grow different numbers of tomato plants. For example, a 6-Pod Harvest supports two tomato plants, while a 9-Pod Bounty supports four.
- When planting tomatoes, use room temperature water and follow guidelines for adding liquid plant food to promote optimal growth.
- Monitor nutrient and water levels regularly. AeroGarden will remind you to replenish them. These factors are essential for good tomato yields.
- Thin out your plant during the early stages. Thinning is a pruning method that cuts out weaker seedlings to ensure a more focused growth.
- Harvest tomatoes just before eating for the best flavor.
What Vegetable Seed Pod Kit Choices Are Offered by AeroGarden?

When growing tomato plants, it is important to note that they require a lot of light and may not be good neighbors to grow alongside many other plants.
Tomatoes need extra space for growth. The number of tomato plants that your AeroGarden can support is more limited than other plant types. As a rule of thumb, the following guide should be followed:
- 6-Pod AeroGarden Harvest (see price) – Supports two tomato plants
- 9-Pod AeroGarden Bounty (view product) – Supports four tomato plants
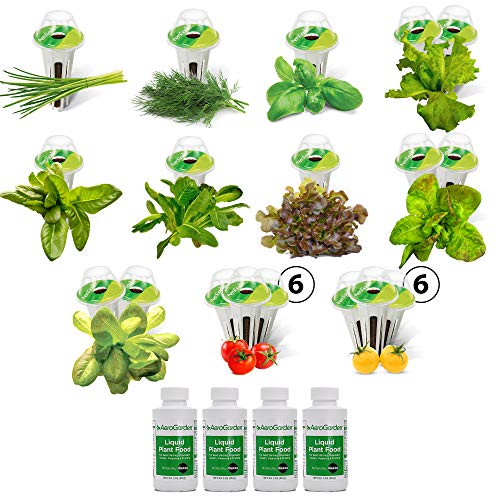
I have listed some seed pod kit options that have tomatoes below for your AeroGarden:
| Seed Pod Kit | Contents |
| Red Heirloom Cherry Tomato Seed Pod Kit (latest price) | Red heirloom cherry tomato |
| Red & Golden Cherry Tomato Seed Pod Kit (latest price) | Red heirloom cherry tomato, Golden harvest cherry tomato |
| Salsa Garden Seed Pod Kit (latest price) | Red heirloom cherry tomato, Jalapeno pepper |
| Golden Harvest Cherry Tomato Seed Pod Kit (latest price) | Golden harvest cherry tomato |
| Salad Bar Seed Pod Kit (latest price) | Chives, Dill, Genovese basil, Parris island, Black seeded simpson, Dear tongue, Marvel of 4 seasons, Rouge d’hiver, Red sail, Red heirloom cherry tomato, Golden harvest cherry tomato |
| Jumbo Veggies Seed Pod Kit (latest price) | Poblano, Mega Cherry tomato, Sweet bell pepper |
| Custom Vegetable Seed Pod Kit (latest price) | Choose 3 from a selection of 5 vegetable varieties including Golden harvest cherry tomato, Red heirloom cherry tomato, Jalapeno, Thai pepper, Purple super hot pepper |
AeroGarden has separately distinguished salad greens from vegetable varieties. Although lettuce is a leafy vegetable, it is categorized under salad greens.
- Learn more: How to Increase Lettuce Yield in an AeroGarden
As you can see, there are no vegetable pod kits that do not contain tomatoes. This shows how people are such a fan of growing these crops!
The Jumbo Veggies Seed Pod Kit includes 10 spacers. Because of the expected size of this pod’s yields, you need to keep a distance between them to allow for growth. You should plant this kit in AeroGarden models with 24 inches or more of grow height allowance. The Farm models are perfect for this requirement.


How Do You Plant Tomatoes in the AeroGarden?
Once you have selected your seed pods, it’s time for the real fun to begin. Planting and germinating your tomatoes with the Aerogarden system is pretty simple.
I cover the step-by-step process below. If you have used your AeroGarden before, you will need to prepare your garden for its new plant growth by sanitizing it. After that, you will need to reset your AeroGarden and plant on it as usual.
You can follow these steps to plant tomatoes in your AeroGarden:
- Fill your bowl with water to the “Fill to Here” mark. Use cool tap water or distilled water. Do not use softened water. It is always good practice to keep the water at room temperature.
- Add Liquid Plant Food (shop now). A guide to how much nutrients need to be added is printed on the labels of each bottle. Stick to the guidelines always. Don’t add more or less than the label advises. That could affect your tomato plant’s yield and growth.
- The next step is to plant your seed pod kit. When growing tomatoes, they must have room to grow so always leave empty gaps between the plants.
- Label your Grow Pods. Labeling will not only keep important information like planting dates and plant names but also inhibit possible algae growth.
- Cover each pod with the supplied Grow Domes
- Position the Grow Lights at their lowest height.
The AeroGarden will give reminders when nutrients and water need to be replenished. When adding nutrients, it is advised that you also top up your water. This helps maintain the right balance and concentration of nutrients in your Grow Bowl.
The average germination time for fruiting vegetables is 7-10 days.
How Do You Grow and Tend to Tomatoes in the AeroGarden?
Now that your seeds have been planted, watered, and fed, they should start to germinate in around a week to a week and a half. This section will take you through the best practices needed to get the best from your tomato plants.
- Keep an Eye on Those Tiny Plants – Once you see them peeking through the seed pod labels, it’s time to take off the domes. Don’t wait too long!
- Give Your Tomatoes Enough Light – Make sure there’s about 6-8 inches between the top of the plant and your Grow Lights. Adjust the lights as needed to keep your plants happy. When provided with the right amount of light, you should see yellow flowers at 5-7 weeks.
- Thin Out Your Plant – Each pod might have multiple seedlings to guarantee successful germination. When they’re about an inch tall, choose the healthiest-looking ones and remove the rest. This will help your plant collect maximum energy without stress from competition.1
- Give It Enough Water and Nutrients – Use room temperature water to avoid shocking your plants. Add nutrients every two weeks. How much to add will depend on your AeroGarden model and the plants that you are growing.
- Prune Your Tomato – Pruning tall leaves is key to a strong plant and good yields. Start when they’re 4-5 weeks old. Count five branches from the bottom, then snip the main stem above the sixth branch. Prune any branches that grow outside the light hood.
- Play Bee – Help your plant pollinate by gently shaking tomato flowers with your hand every other day when the lights are on. This spreads pollen and helps fruit grow. Unpollinated flowers of tomato and pepper plants will simply fall off without producing any fruit.
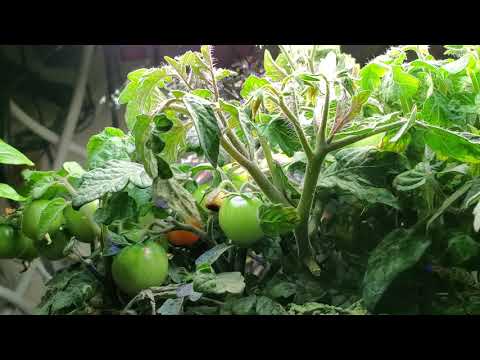
- Remove Dead or Brown Leaves – Dead or brown leaves may cause molds if left unattended. Make sure to free your Grow Deck of these for a healthy tomato plant.
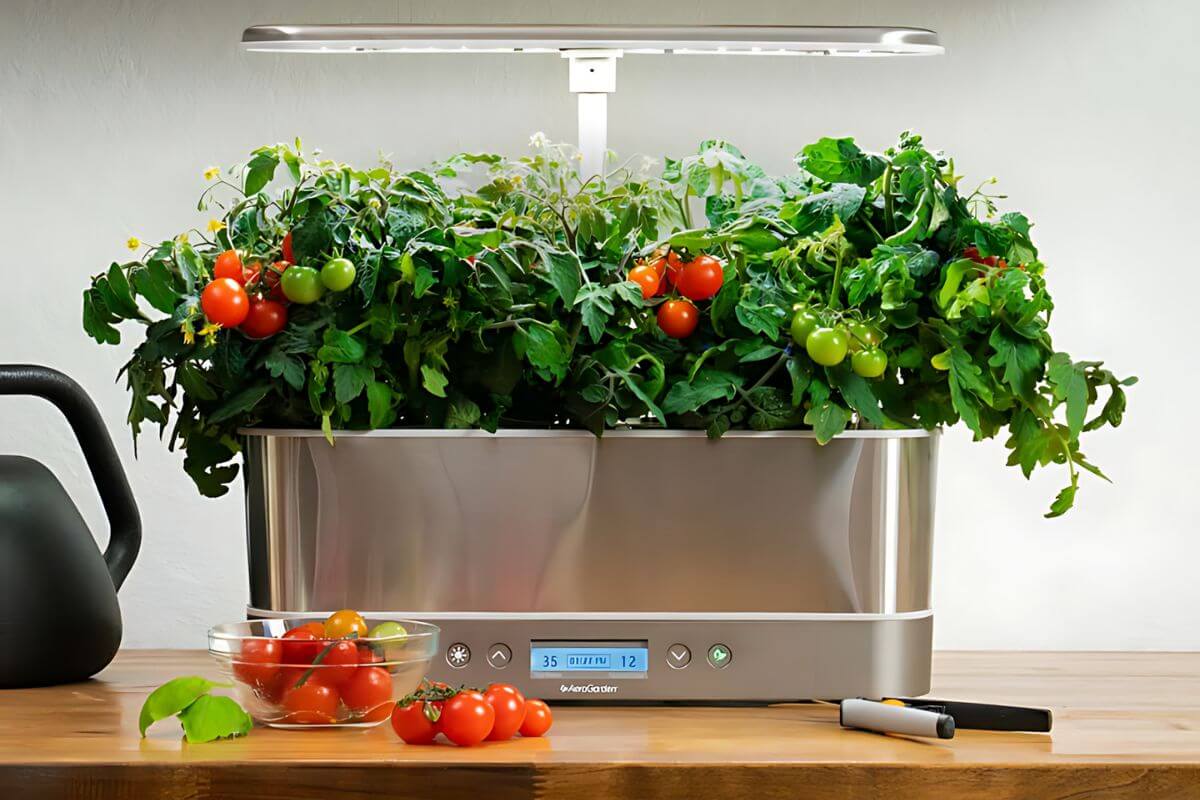
- Support Your Plant – Use bamboo sticks, chopsticks, or AeroGarden’s trellis system to keep them upright. This is especially important when they’re heavy with fruit.
How Do You Harvest Tomatoes in the AeroGarden?
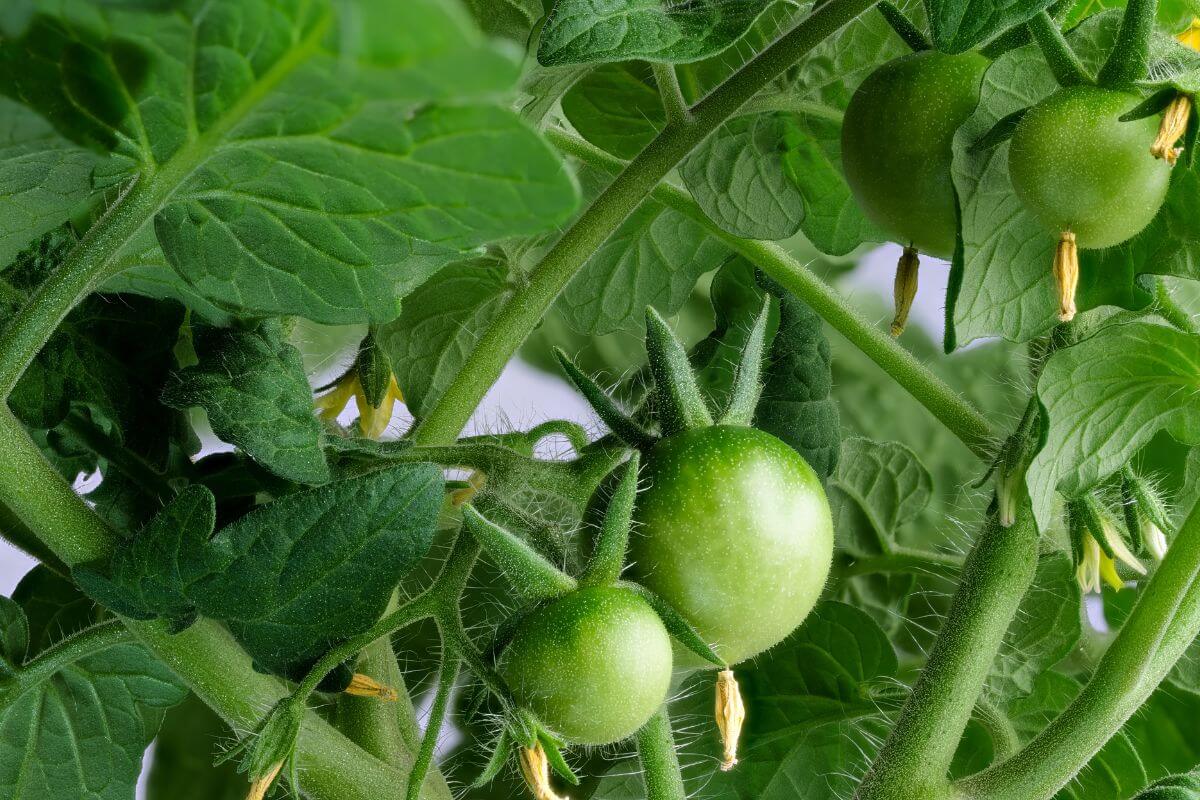
Patience will be required with tomatoes as they aren’t the quickest to get to the harvest stage. You can pick your first tomato 100 days from germination.
Here are some handy tips to help you harvest tomatoes the right way:
- Give the tomato a gentle squeeze. If it’s ripe, it will feel firm with a bit of “give” as you squeeze.
- Keep the stem branch and tomato leaf attached when you pick your tomatoes to help them stay fresh longer. Your juicy tomato can get nutrients and moisture from the stem for a day or two after picking.
- Harvest tomatoes just before eating for the best flavor. Refrigeration can soften their flesh and dull their taste. But if they’re already ripe, refrigerating is better than letting them over-ripen on the vine.
Growing tomatoes is an art and a science. By following these tips, you’ll be well on your way to becoming a tomato master gardener. There’s no wrong way to savor your homegrown harvest.
AeroGarden Tomatoes Final Thoughts
Growing tomatoes in your AeroGarden is easier than you think! These little red gems love light and space so it is important to give them room to stretch their leaves. AeroGarden offers cool seed pod kits like Red Heirloom Cherry Tomato and Salsa Garden. Folks can’t get enough of these homegrown treats!
To keep your tomato plant healthy, make sure to keep an eye on those nutrient levels. Prune with care and make sure they’re basking in plenty of light. Support your plants with a trellis as they grow higher. This will help them grow strong and produce more fruit.
The best time to pick these prized vegetables is right before you eat them. That’s when they’re bursting with flavor. If they’re already ripe, pop them in the fridge. Don’t let them hang around too long on the vine.
If you want to maximize your yields, try different tomato varieties. Some folks swear by yellow tomatoes for a sweeter taste. Others love the classic red ones. It’s all about finding what works for you.
Tomatoes are a summertime crop but with your AeroGarden, you can enjoy them year-round! Just make sure to place it near sunny windows for an extra boost. Keeping the nutrient balance right is also key. With a little love and attention, you’ll have vine-ripened tomatoes in no time.
AeroGarden Tomatoes FAQs
1. How Long Do AeroGarden Tomato Plants Last?
Growing plants in an AeroGarden or hydroponic system isn’t too different from traditional gardening. How long they live depends on the type of plant and how you care for them. Tomatoes and peppers can keep producing fruit for 6-9 months or even longer.
2. Can You Really Grow Tomatoes in AeroGarden?
Yes, you can. However, picking the right tomato plants for your AeroGarden can make a big difference. You’ll want to go for compact varieties such as cherry tomatoes that don’t take up too much space. These little guys are perfect for indoor growing and will fit nicely in your AeroGarden setup.
3. Why Are My AeroGarden Tomato Leaves Turning Yellow?
Yellow leaves on your tomato plants can be a real bummer. This could be a sign that your plants are hungry for some key nutrients. Nitrogen, potassium, and magnesium are the usual suspects here. If you see the whole leaf going yellow, it’s probably nitrogen that’s missing. But don’t go overboard with it too. Too much nitrogen will leave you with leaves and no fruit.
For guides on how to grow and harvest other plants in the AeroGarden, check these articles out:
- How to Grow Strawberries in an AeroGarden
- Guide to Parsley Pruning in an AeroGarden
- Why Is AeroGarden Lettuce Bitter
- AeroGarden Basil Growth Guide
- https://store.extension.iastate.edu/product/Tomatoes
- https://extension.umn.edu/vegetables/growing-tomatoes
- https://www.ndsu.edu/pubweb/chiwonlee/plsc211/student%20papers/articles02/rjohnson/rjohnson.html
- https://blogs.ifas.ufl.edu/news/2022/05/26/uf-research-sheds-light-on-which-compact-tomatoes-grow-well-indoors/