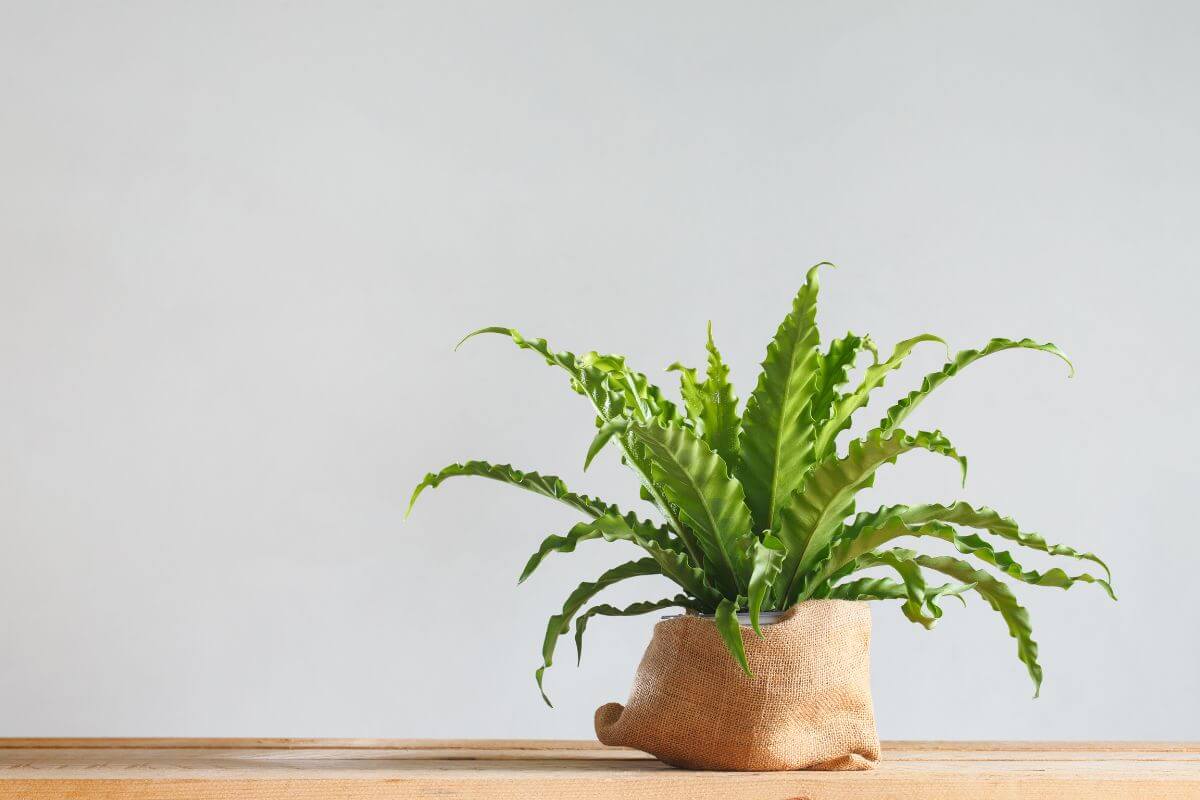
I love having green ferns as indoor plants, and the bird’s nest fern is one of my favorites. This fern stands out with its unique look and offers so many benefits. People around the world still grow it because it’s just so special.
Did you know that Native Americans have been using the bird’s nest fern for its healing powers for a long time? It’s true! They found it helpful for things like colds, coughs, sore throats, fevers, and even bad breath.
If you’re thinking about adding a bird’s nest fern to your home, I’m here to share all the tips you need to care for and grow this amazing plant indoors. It’s going to be a wonderful addition to your space.
7 Key Takeaways on Bird’s Nest Fern
- Bird’s Nest Ferns love bright, indirect light. They thrive by mimicking tropical rainforests.
- They grow from a central rosette. Outdoors, fronds can reach 3 to 5 feet. Indoors, they stay smaller.
- High humidity and consistent moisture are key. Water them once a week or when the top inch of soil dries.
- Repot every 2 to 3 years or when root-bound. Use well-draining soil.
- You can propagate them by collecting spores or dividing roots. Each method needs specific conditions to succeed.
- Bird’s Nest Ferns are safe for pets. But if eaten, they might cause mild stomach upset.
- Watch for yellow leaves from overwatering and brown edges from underwatering. Pests like mealybugs and scale insects can also be a problem.
Bird’s Nest Fern Overview
The Bird’s Nest Fern, or Asplenium nidus, is a unique tropical plant that loves to grow on other plants, a habit known as being epiphytic. You can find this fern in the lush rainforests of Asia, Hawaii, Australia, East Africa, and Polynesia, where it thrives on trees.
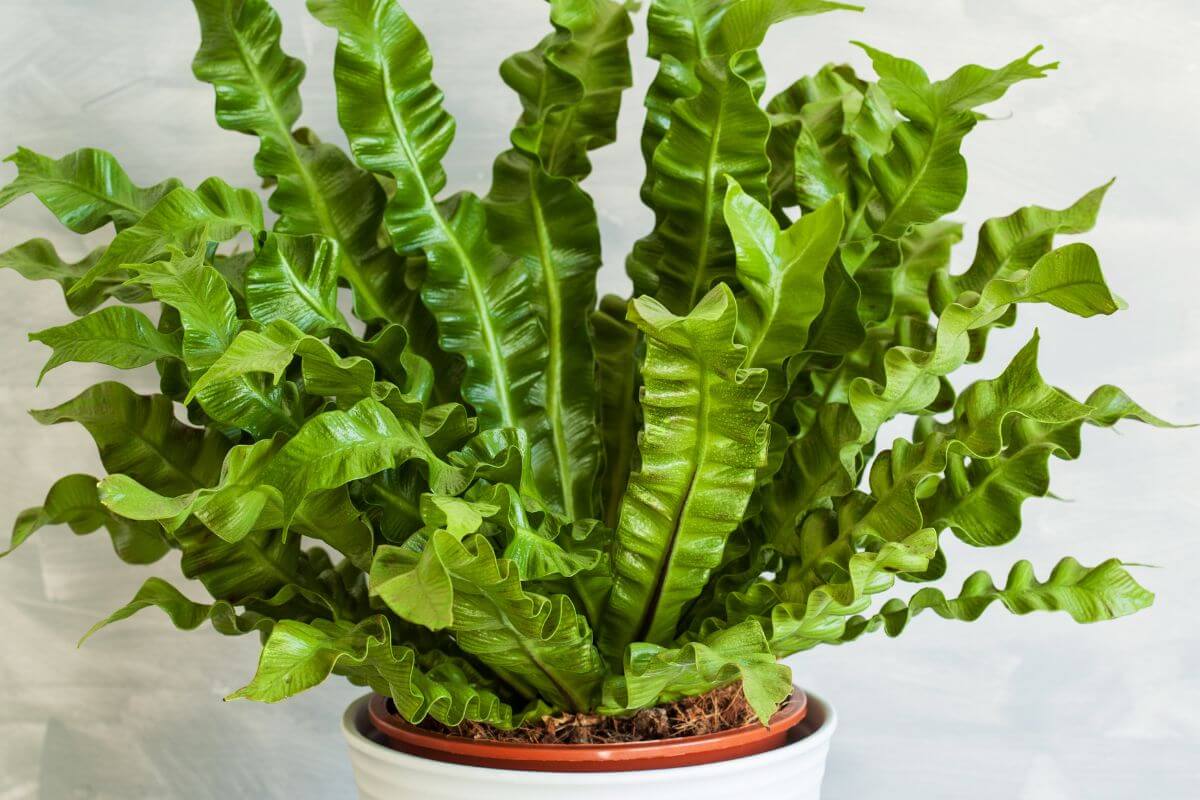
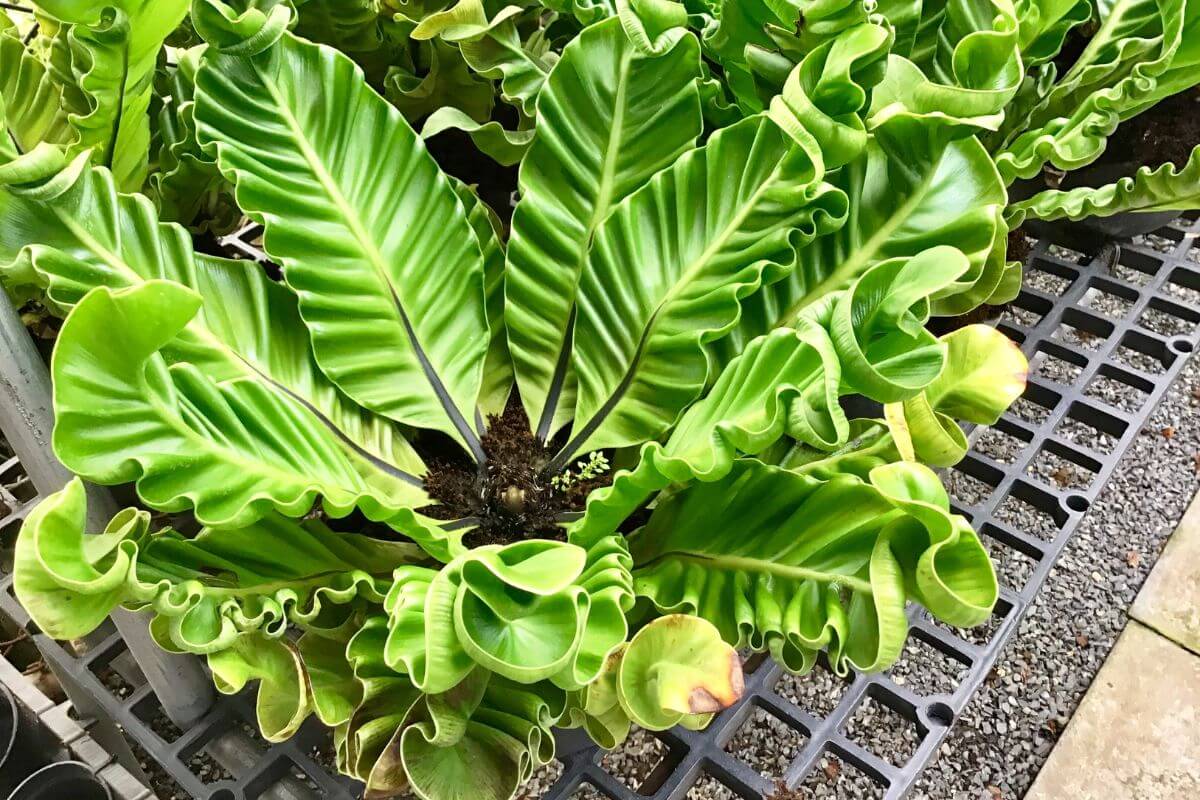
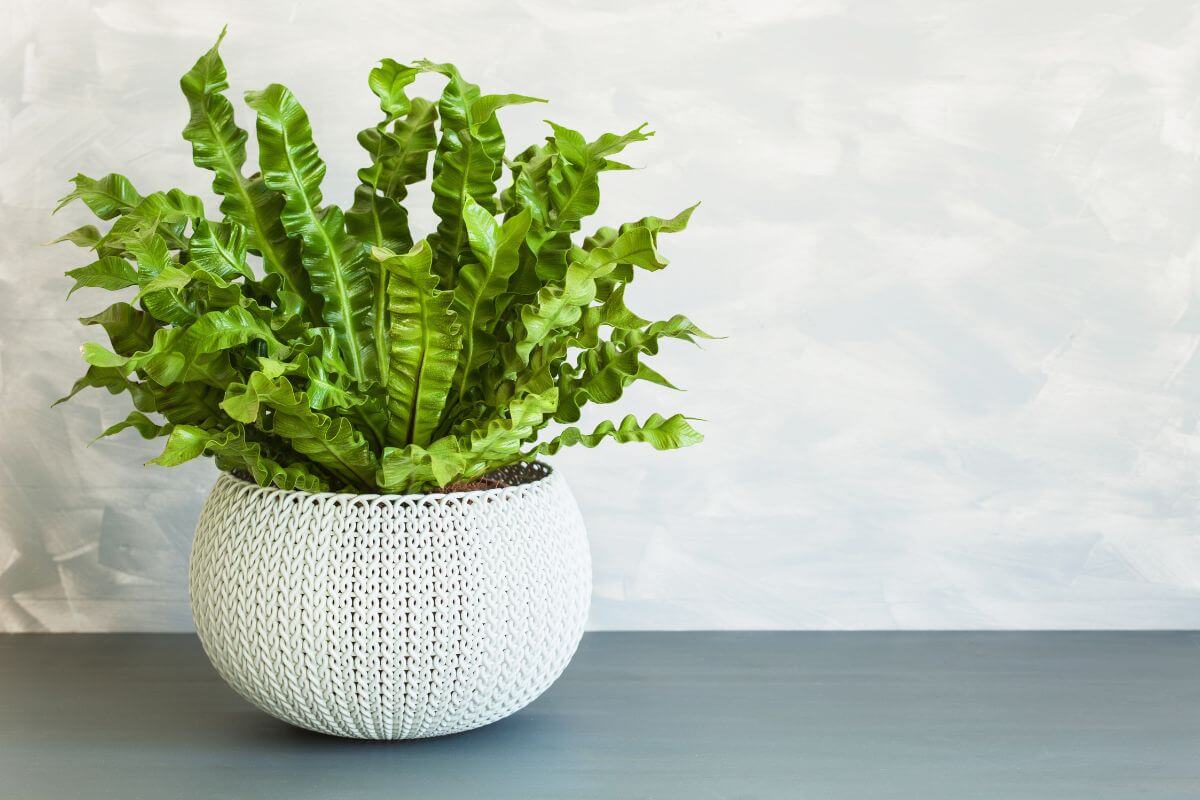
What makes the Bird’s Nest Fern stand out are its stunning green fronds. These leaves grow from the center of the plant in a rosette shape, creating a beautiful nest-like look. Outdoors, the fronds can reach up to five feet long, and the plant itself can grow three to five feet tall and two to three feet wide. However, when we bring this beauty indoors, the fronds typically grow about two feet long.
The fronds are not just any green, they’re light green with a crinkled texture and a striking black midrib. They unfurl in a circular pattern from the center, adding to the plant’s unique appearance. Spores, which help the plant reproduce, are found on the underside of the fronds in long rows along the midrib.
This fern’s ability to thrive in various tropical locations and its impressive green fronds make it a favorite among plant lovers. Whether in a rainforest or your living room, the Bird’s Nest Fern brings a touch of the tropics with its lush, green presence.
Bird’s Nest Ferns are generally non-toxic to pets, including cats and dogs, making them a safe choice for households with animals.
However, ingestion can still cause mild gastrointestinal irritation in some dogs due to the presence of insoluble calcium oxalates.

Different Varieties of Bird’s Nest Ferns
Bird’s Nest Ferns come in different types, each with its own unique leaf shape. Here are some of the interesting varieties:
- Asplenium nidus ‘Crissie’ – This type has smooth leaves that spread out at the tips, looking like hands.
- Asplenium nidus ‘Crispy Wave’ – Its leaves are highly wavy, giving it a curly, textured look.
- Asplenium nidus ‘Fimbriatum’ – This one has fringed leaf edges, looking delicate and feathery, like carrot greens.
- Asplenium nidus ‘Osaka’ – Unlike the ‘Crispy Wave,’ its leaves curl only at the edges, making a sleeker shape.
- Asplenium nidus ‘Antiquum’ – This variety features wavy leaf margins, adding to its decorative charm.
- Asplenium nidus ‘Campio’ – Known for its ruffled, feather-like leaves, it offers a lush, soft look.
- Asplenium nidus ‘Victoria’ – With long, tongue-like fronds and wavy edges, this type makes a strong visual statement.
These ferns not only add greenery to your space but also come in a variety of shapes and textures that can improve your indoor garden’s aesthetic.
Bird’s Nest Fern Care Guide
Caring for this houseplant means paying close attention to the temperature, humidity, and moisture it gets.
A perfect spot for this fern is in your bathroom, right by the shower or bathtub. This way, it gets plenty of the humidity it loves. It’s also important to make sure it has enough warmth and light.
- Read more: Guide to the Best Plant Humidifiers
You’ll notice new growth in the center of the plant, which looks like a bird’s nest. That’s why it’s called a bird’s nest fern.
Try not to touch the new fronds. Handling them can cause damage or make them grow weird. While pests can be an issue, this fern isn’t usually prone to diseases. Let’s dive into more tips on keeping your fern happy and healthy.
Bird’s Nest Fern Soil Requirements
Bird’s Nest Ferns thrive in well-drained soil and a moisture-retentive organic soil mix that mimics their native habitat. An ideal blend includes:
- 2 parts peat moss or coco coir
- 1 part perlite
- 1 part fine-grade orchid bark
This combination ensures excellent aeration and drainage while retaining adequate moisture. The pH level should be slightly acidic to neutral, around 5.5 to 7.0. For a DIY mix, you can use :
- 2 parts patio potting mix
- 1 part fine-grade orchid mix
Commercial fern-specific or African violet potting mixes also work well. Make sure the pot has drainage holes to prevent waterlogging. When repotting, choose a 1-2 sizes larger container, as Bird’s Nest Ferns prefer being slightly root-bound.
Bird’s Nest Fern Light Requirements
Bird’s Nest Ferns thrive in bright, indirect light, making them perfect for locations near east-facing windows or a few feet away from north or west-facing windows. Avoid direct sunlight, as it can scorch their delicate fronds.
If natural light is insufficient, especially during winter, use LED or fluorescent grow lights, ensuring they are positioned to avoid burning the leaves.
Outdoors, these ferns do best in dappled sunlight under a canopy, which mimics their natural tropical habitat. To ensure even light exposure, regularly rotate the plant and adjust its position seasonally to accommodate changing light conditions.
Bird’s Nest Fern Water and Humidity Requirements
Bird’s Nest Ferns thrive in high humidity and require consistent moisture. Water them when the top inch of soil feels dry, typically once or twice a week. Use room temperature, filtered water to avoid sensitivity to chemicals. Water at the base of the plant, avoiding the center rosette to prevent rot.
Maintain humidity levels between 50-80% for optimal growth of the Bird’s Nest Fern. To increase humidity:
- Mist the fronds regularly
- Use a pebble tray filled with water
- Place a humidifier nearby
- Group the fern with other plants
In drier environments, mist daily and consider placing the fern in naturally humid areas like a bathroom.
Make sure you use proper drainage and never let the plant sit in standing water to prevent root rot. Reduce watering frequency in winter when growth slows.
Watch for signs of under or overwatering. Yellowing fronds can indicate overwatering, while brown, crispy edges may suggest underwatering or low humidity.
Bird’s Nest Fern Temperature Requirements
Bird’s Nest Ferns thrive in temperatures between 60°F and 80°F (15°C to 27°C), with an ideal range of 65°F to 75°F (18°C to 24°C) which fortunately is around the average home temperature. While they can tolerate brief periods down to 50°F (10°C), prolonged exposure to colder temperatures can cause damage.
Bird’s nest temperature tips for optimal growth:
- Move plants indoors when outdoor temperatures drop below 50°F (10°C).
- Monitor temperature regularly using a thermometer.
- Avoid placing ferns near drafty windows, doors, or HVAC vents.
- Protect from extreme temperature fluctuations.
Fertilizer for the Bird’s Nest Fern
Bird’s Nest Ferns benefit from a balanced fertilization regimen to support healthy growth. Use a liquid fertilizer with a balanced NPK ratio of 20-20-20, diluted to half strength. Apply this fertilizer monthly during the growing season (April to September) to prevent over-fertilization, which can damage the plant.

For a gentle nutrient boost, use organic matter like worm castings. Sprinkle a quarter cup on the soil monthly. Avoid fertilizing during the dormant period (fall and winter) to prevent nutrient buildup.
How Do You Prune and Repot the Bird’s Nest Fern?
You don’t need to prune the bird’s nest fern often. Just cut off any old or dying leaves on the outside. Use sharp scissors or garden shears for this task.
This fern is an epiphyte. It doesn’t need repotting for more root space. Instead, it may need a bigger pot every two to three years. This is because it will outgrow its current pot and need more room to attach itself.
When it’s time, here’s how to repot the Bird’s Nest Fern:
- Gather materials including a new pot (1-2 inches larger in diameter with drainage holes), a well-draining soil mix (peat moss, perlite, and orchid bark), and tools (trowel, scissors, watering can).
- Gently slide the fern out of its current pot. Loosen the roots carefully if it’s root-bound.
- Inspect the roots for rot or damage and trim any unhealthy roots with sterilized scissors.
- Place the fern in the new pot at the same depth, filling around the root ball with the soil mix to stabilize it.
- Water thoroughly to settle the soil and eliminate air pockets, allowing excess water to drain.
- Place the fern in a location with bright, indirect light and maintain high humidity.
Repotting is best done in spring, every 2-3 years, or when roots start emerging from the drainage holes.
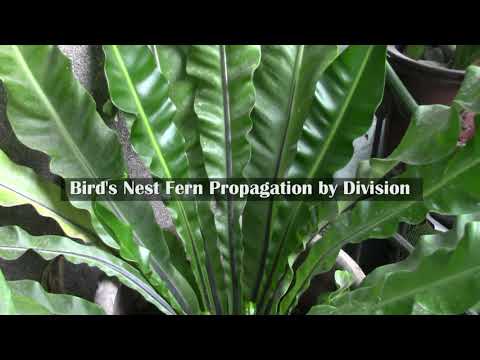
How to Propagate the Bird’s Nest Fern
Propagating Bird’s Nest Ferns (Asplenium nidus) can be a rewarding but somewhat challenging process.
The two main methods for propagation are spore propagation and division, each requiring careful handling and specific conditions.
Steps to do spore propagation:
- Collect Spores – Remove mature fronds and place them in a paper bag for several days. The spores will collect at the bottom of the bag.
- Prepare Pot – Fill a new pot with sphagnum moss. Sprinkle the collected spores on top of the moss.
- Watering – Water the moss from the bottom to maintain moisture.
- Humidity – Set the container in a dish of water to allow the plant to soak up moisture through drainage holes. Place the container in a plastic bag to maintain high humidity.
Steps to do division propagation:
- Repot Sections – Plant each section in a new pot with a well-draining soil mix. Water thoroughly and place in a humid environment with indirect light.
- Separate Plant – Carefully remove the fern from its pot and gently separate the root ball into smaller sections, ensuring each section has fronds and roots.
Bird’s Nest Fern Pests, Diseases, and Problems
Bird’s nest ferns can face a few challenges, like pests and diseases. Here are some common issues and their causes:
| Problem | Cause |
|---|---|
| Yellowing Leaves | Overwatering, nutrient deficiencies, or insufficient light. |
| Brown Leaf Edges | Underwatering, low humidity, or exposure to cold temperatures. |
| Wilting Fronds | Improper watering (too much or too little) or incorrect humidity levels. |
| Fungal Infections | Caused by Anthracnose and Botrytis, thrive in moist environments, leading to leaf spots and stunted growth. |
| Pest Infestations | Mealybugs and scale insects that damage the plant by feeding on its sap. |
| Foliar Nematodes | Microscopic worms that damage the leaves. |
| Slugs and Snails | Particularly problematic for outdoor plants. |
| Pale or Burnt Leaves | Too much direct sunlight. |
| Root Rot | Caused by overwatering or poor drainage. |
| Stunted Growth | Results from insufficient light, inadequate nutrients, or pest problems. |
Growing Bird’s Nest Fern Final Thoughts
The Bird’s Nest Fern brings a splash of color to dim corners. It’s a perfect pick for your home or workspace if you’re after a plant that can handle low light.
Want a unique houseplant that stands out? This fern might be your answer. It thrives when you give it the right mix of warmth and moisture.
I’ve grown these ferns for years, and they never fail to impress. You’ll love how their wavy fronds unfurl, creating a nest-like shape. It’s like watching nature’s own art show right in your living room!
Growing Bird’s Nest Fern FAQs
1. How Much Sun Does a Bird’s Nest Fern Need?
The Bird’s Nest Fern needs full sun but only indirect exposure to avoid burning. For indoor care, fluorescent bulbs provide suitable lighting without being too intense.
2. Is the Bird’s Nest Fern Hard to Care For?
The Bird’s Nest Fern is not hard to care for and requires minimal maintenance. Provide a warm, humid environment and regular watering, ensuring the soil does not dry out completely or become waterlogged.
3. How Big Do Bird’s Nest Ferns Get?
Bird’s Nest Ferns can reach heights of 3-5 feet tall but generally remain smaller due to their compact growth habit.
4. How Often Should I Water a Bird’s Nest Fern?
Water Bird’s Nest Ferns once every week or two, depending on the plant’s needs. Ensure the topsoil dries out between waterings, but avoid overwatering to prevent root rot.
For more houseplant grow guides, check out the following articles: