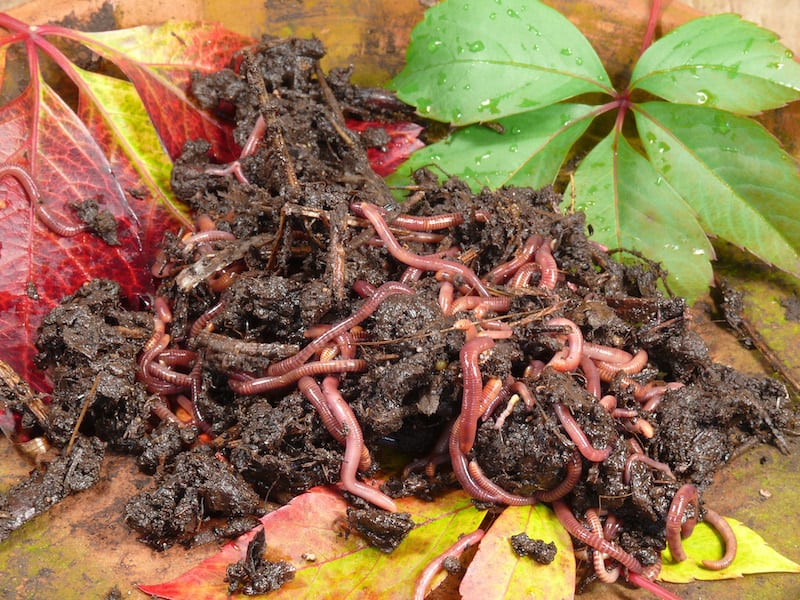
Small-scale composting is becoming very popular as a way to reduce waste and put food scraps to good use rather than sending them to a landfill, and vermicomposting is a favorite way of doing that.
Vermicomposting can be done even if you don’t have a yard, as worm compost bins can be kept indoors or on balconies. It is the perfect way to start composting, as it can be used on its own or in conjunction with another composting system.
If you are interested in vermicomposting, then this article will help you get a clear picture of what vermicomposting is and how to go about starting a worm compost bin.
What is Vermicompost?
Vermicompost is the finished compost (product) of the vermicomposting process. It contains worm castings and rotted organic matter. Vermicompost can be used in the same way as regular compost and has similar benefits.
Learn more about the differences between vermicompost vs compost.
Vermicomposting is a composting process that primarily uses worms. While any outdoor open-air composter will contain worms, vermicomposting relies on worms to break down the organic waste, especially the food.
You can get outdoor vermicompost bins that allow the worms to come and go as they please. But usually, worm compost bins are enclosed and have worms added that consume the scraps.
Benefits of Vermicomposting
There are many benefits of worm composting, especially the worm castings, aka worm manure, that help to accelerate plant growth.
I’ve compiled a list of the 5 key benefits of vermicompost.
1. Disease Suppressant
Studies have shown that vermicompost can help protect plants from some soil-borne diseases. While it doesn’t kill the pathogens that cause the disease, it can prevent them from attacking your plants.
2. Nutrients
Vermicompost is high in phosphorus and nitrogen, and usually has a higher level of nutrients than regular compost.
3. Water Retention
Vermicompost can be pretty dense, giving it fantastic water retention properties. This feature means that it is an excellent amendment for any type of soil, as it will help maintain moisture in sandy soil and break up heavy clay.
4. Microorganisms
Vermicompost is often very high in beneficial bacteria and fungi that keep the soil healthy. This property makes it the perfect amendment for soil that has been stripped by chemical fertilizers.
Vermicompost can help restore balance in your soil and is an excellent organic material to add, especially to vegetable gardens and farmland.
5. Pest Control
While vermicompost won’t kill bugs, it can deter them. Studies have shown that vermicompost can suppress parasitic nematodes and control the population of insects, mite pests, and fruit flies.
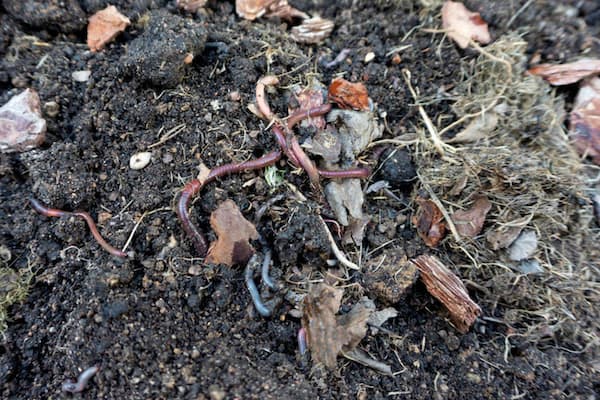
Overview of Worms for Vermicomposting
In open-air outdoor composting, many native, common worms will help break down the organic matter. In an enclosed worm composter, you will need to add the worms yourself.
You can use many kinds of worms, but the most common are red wrigglers. Most worm compost bins are designed explicitly for red wrigglers, and you may find you won’t be able to use any other type.

When choosing worms for a purchased worm composter, you should always refer to the manufacturer’s recommendations. They will usually recommend the best worms for their composters.
Below are some FAQs about worms used in vermicomposting.
Are Regular Earthworms in Gardens Good for Vermicomposting?
Most vermicomposting worms are called earthworms, so you may think you can save yourself some money by adding the worms that are already in your yard or garden soil.
While you will find regular earthworms in a traditional compost pile, there are two reasons why they should not be used in vermicomposting.
- Vermicomposting can generate higher temperatures than regular composting, and common earthworms are not tolerant of heat. Heat is needed to break down the vegetable scraps and other compost materials, so healthy worms are necessary.
- Standard earthworms do not consume waste like specialist compost worms and absorb nutrients through their skin. This absorption means they will not contribute to the breakdown of organic matter. Breakdown occurs when the worms eat the compost materials and leave worm manure behind.
In summation, regular earthworms are not suitable for vermicomposting, even though you will probably find them in an open-air compost heap.
If they are in your outdoor compost, it isn’t an issue – but they are not productive enough to be the only worms you use in a worm composter.
That being said, you may be lucky enough to find red composting worms in your garden. To find compost worms yourself, look in damp, rotting organic materials.
Compost worms live in the top few inches of the soil’s surface, so you won’t have to dig far down to find them.
What Kind of Soil Conditions Do Worms Need to Grow and Do Well?
To get the most out of your worms and keep them happy and healthy, you will need to maintain a consistent temperature range and give them sufficient moisture. While the worms will survive in low temperatures, the optimum temperature range is 65°F to 85°F.
Moisture is essential for your worms, and ideally, you should have moisture content of 70 – 80 percent. Compost worms will try and escape if the water content gets too high, as the oxygen levels will drop in saturated worm bins. That’s why you’ll often find worms above ground after it rains.
While your worms will be eating your nitrogen-rich food scraps, they prefer materials high in carbon. You will have to balance out the nitrogen in your kitchen scraps with carbon-rich items like straw, dried leaves, shredded newspaper, cardboard, or paper. This material is often called “dry bedding” as it also helps aerate and dry the compost bin, so that it’s not too wet.
Worms also prefer a neutral pH balance of 7 to thrive. If your worms don’t seem to be doing well and you’re not sure why, then check the pH balance just in case. Ideally, the pH should be 7, but they can survive in a pH range between 5 and 9.
How to Calculate How Many Worms Per Square Foot You Need?
Many worm composters will give you a rough estimate of how many worms you will need to start with that particular system.
It is also important to remember that adding more worms into your composter is easier than removing them, so be careful of a large worm population initially. for small areas.
Red wrigglers will regulate their reproduction based on environmental factors, so they will balance out their colony depending on space and food availability.
However, a good guide to go by is to get one pound of worms per square foot of space. Red wrigglers will eat their weight in food scraps, so you could calculate it as one pound of worms for every pound of waste. If you are buying them per worm rather than by weight, roughly 1000 worms will weigh a pound.
How to Build a Vermicompost Worm Bin
There are many worm compost bins available to buy (see my article “Best Worm Composters” for more details), but you may want to have a go at making your own.
There are many different types of worm composters that you can make. I’m going to take you through the steps on how to make a stacked vermicompost bin because they’re the most efficient.
1. Gather Materials to Build a Vermicompost Worm Bin
To make a stacked worm compost bin, you will need the following items:
- A Drill
- Several Containers – These can be any size or shape, but they must be the same, so they can be stacked on top of each other. You can use buckets, storage bins, or storage trays that are at least 20cm deep. Make sure the containers are not opaque (see-through), as worms like the dark. You should buy at least three containers to begin with to allow for 3 levels or compost materials. You can always add more at a later date if you need to. Remember, you will need a lid for the top container, so be sure to buy a matching lid.
- A Couple of Bricks -These will act as a stand for your worm composter. You can use anything as a stand, so if you fancy something a bit more ornate than bricks, I suggest you look up plant pot feet as an alternative.
- A Tap (optional) – You will need drainage for your worm bin in case of a build-up of liquid that you need to drain. You can add a tap to make this job easier, but it is not absolutely necessary.
- Spacers – Whether or not you need spacers will depend on the type of containers you are using. If you are using containers that stack fully onto each other, then you will need spacers to provide space for your worms to move around it. You can use anything, like blocks of wood or sealed jars. You can purchase containers that don’t “nest” into each other, in which case, the spacers won’t be needed.
2. Choose a Space for the Worm Bin
Worm bins can be kept indoors or outdoors, making them very versatile.
If you plan on keeping your worm bin outside, you must ensure that it is protected from the weather. It needs to be somewhere sheltered from the rain, so the bin won’t get flooded.
It also needs to be protected from excessive heat and cold. It cannot be placed in direct sunlight and needs to be sheltered from frost and freezing temperatures.
3. Set Up the Worm Bin’s Drip Tray (Bottom Container)
The bottom container will need to be set up differently from the others, and I will refer to it as the drip tray from here on.
This container will remain at the bottom, unlike the others that will be interchangeable. You can use the same type of container as your other ones that contain the worms and organic material. Or you can use a different one as long as the other containers fit inside it.
The function of the drip tray is to collect any liquid run-off. If you want to add a tap, add it to the bottom container by drilling a hole and adding the tap.
Ensure that you seal the tap well, as you don’t want the leachate (excess liquid) dripping out!
If you don’t want to use a tap, this container can be left as-is, although it might be more complicated and messier to empty the excess liquid should you need to. Once you have set up the drip tray, place it on your bricks or stand in your chosen location.
4. Set Up the Worm Bin’s Other Containers
Your other containers will hold the worms and the vermicompost. Each container will be adapted in the same way.
You will need to drill holes in your container for aeration and allow the worms to migrate upwards, leaving the vermicompost. Your holes should be around 6mm in diameter and evenly spaced, leaving roughly 50mm between the holes.
You can also add holes in the sides of your containers for extra aeration, depending on how deep your containers are. Only add holes 100mm below the top of the container.
You won’t need to drill holes in the lid, as the airflow from the sides should be sufficient.
5. Setting up the System
Put your top two containers, plus spacers if needed, on top of the drip tray. You will also need spacers, or plant pot feet, in your bottom container to allow any excess moisture to pool underneath your worm bin containers.
Cover up or fill any gaps in the sides with a breathable material like muslin or mosquito netting. This will prevent other bugs from getting into your worm farm, as well as stop the worms from getting out.
Add bedding materials, like coco coir, cardboard, or straw, into the top container, along with some compost or dirt, and your worms. Give them a couple of days to settle in before adding food scraps.
Monitor the moisture of the bin, and add a sprinkle of water if it’s dry. Or add dry bedding if it’s too wet.
Once the worms have produced a significant amount of vermicompost, swap the top two bins over. Put the full container (#1) into the drip tray and place the empty container (#2) on top.
Put fresh bedding into your new container and start adding food waste. The worms will migrate upwards into the fresh materials.
Roughly three weeks after you have swapped the containers, you should be able to start harvesting the vermicompost from #1 without too many worms still in the container.
Remove container #1 from underneath container #2, empty the vermicompost to use as you wish, then repeat the entire process by putting #1 on top of #2 with fresh bedding and organic materials.
Maintaining a Vermicompost Worm Bin
To maintain your compost bin, the most important thing to monitor is the moisture levels. Too much moisture and your worms will suffocate. Too little, and they will dry out.
You should also keep an eye on the temperature, as your worms will not be happy if the temperature gets too cold or too hot.
It will benefit your worms if you cut up anything you add into small pieces, and shred any paper or cardboard that you put in.
Only add food waste that is suitable for worms. Here is a short list of items which you should not add to your compost pile:
- Citrus fruit – Citrus peel may make the conditions too acidic for your worms.
- Onions and garlic – strong-smelling foods such as these can make your worm composter too smelly.
- Meat or meat products such as fats or bones.
- Plastic – Avoid any coated cardboard or paper and take care to discard any fruit stickers.
- Yeast products such as bread and crackers.
- Oils
- Dairy products
- Dog or cat feces
- Treated wood
- Diseased or bug-infested plants
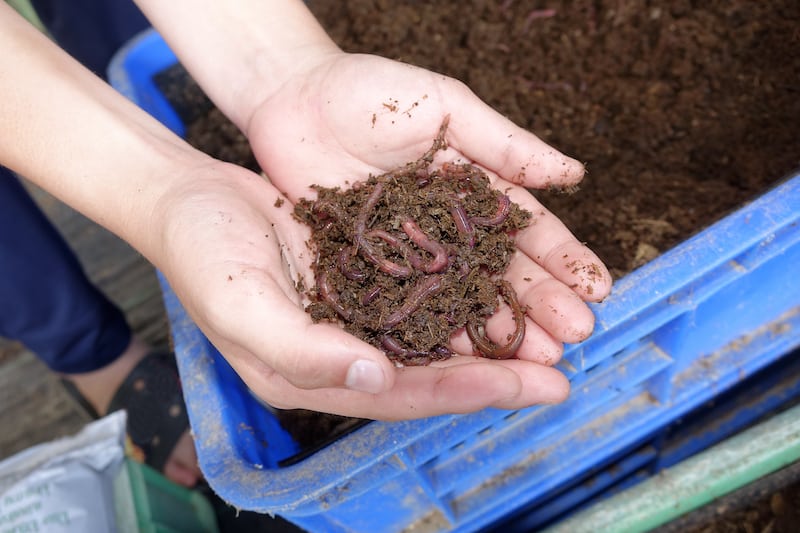
Harvesting Compost and Worm Castings
Harvesting the vermicompost is relatively easy. You remove the bottom-most worm container after giving the worms a chance to migrate upwards into the new container. As worms work through the vegetable waste and yard waste, they’ll move to higher bins with fresher, non-decomposed materials.
This process may vary depending on what type of worm bin you have, but as compost worms usually live in the top few inches of the soil, harvesting compost from underneath is relatively easy.
You may come across a few stragglers when harvesting your compost. These stray worms are nothing to worry about, and you can add them back into the top container.
If you find more than a couple of worms in your compost, put the container back on the bottom and give them some more time to migrate upwards. It could be that not enough materials have decomposed, so the worms are still in the container.
For more information on what to do with your finished vermicompost and worm castings, check out my other articles, “What are Worm Castings,” “How To Store Worm Castings” and “How To Use Worm Castings.”
Vermicomposting Problems and Solutions
You may encounter a few problems when vermicomposting. Luckily, most of these are preventable and fixable. Here is a list of the most common vermicomposting issues and how to avoid them.
1. Bad Smells From Compost Pile
Bad smells will only occur if the food waste is rotting before the worms have a chance to eat it. Foul odors are usually a result of too much nitrogen and not enough oxygen.
To avoid and fix this issue, you should mix in more carbon-rich materials to absorb excess moisture.
If you find that your worm bin is starting to smell, mix up the ingredients to add oxygen and add some shredded cardboard, paper, or bedding materials like coco coir.
Leave your bin open to air out, but monitor it to ensure nothing is going in or coming out!
2. Fruit Fly and Fly Infestation
Fruit flies and regular flies are attracted to food waste. Flies can then quickly lay eggs that lead to an infestation. You can prevent flies from accessing your worm farm by using mosquito netting or covering up food scraps with a layer of shredded cardboard or paper.
Learn more about Preventing Fruit Flies in Compost.
3. Worms Escaping
If your worms are leaving your composter, it is usually because its living conditions aren’t right. The worms are looking for better conditions to live in.
Worms can tolerate a range of environments until they have had enough and will start a mass exodus, usually in the middle of the night.
These break-outs might happen for various reasons, including temperature being too hot or cold, the pH level is too alkaline or acidic, excess moisture, or too much compost. Each of these problems has an easy fix, but it’s best to monitor your worm bin, so your worms stay happy in their home.
If everything is fine in your worm bin and your worms are still trying to escape, then the weather may be to blame. Worms can sense biometric pressure and come to the surface before heavy rainfall or thunderstorms.
Unfortunately, you can’t do much about the weather, but you can predict it and take extra measures to keep your wiggly friends from escaping.
Vermicomposting Tips
Vermicomposting can be a wonderful and rewarding experience. But it is important to remember that you are keeping living creatures.
While worm bins can carry on and produce finished compost without much help – they can be left unattended for up to 6 weeks – worm composters are not something that you can set up and then forget about.
Don’t think of vermicomposting as a form of composting. It’s better to view your worms as pets and the vermicompost they produce as a valuable by-product.
Vermicomposting is a great thing to get kids involved with, as most young kids are fascinated by worms! You can use it to teach them about composting, biodegradability, and other environmental issues.
Vermicomposting is not for the squeamish, and you will have to be ok handling a pile of worms and dirt. Although you won’t have to do this often, if you don’t like the idea of picking up a worm, then this form of composting isn’t for you.
Learn more about Other Composting Methods.
Vermicomposting Final Thoughts
All in all, vermicomposting is a very worthwhile way to recycle organic matter into a nutrient rich soil amendment. You can use the vermicompost with your garden and potting soil.
I hope this article has given you the tools you need to decide if vermicomposting is for you, as well as being a source of information to get you started.
Check out some more articles on composting to learn more: